Tuesday, November 19, 2013

Sour Cream Chicken Enchiladas (mild, and without using condensed soup)


If you like a "hotter" dish than we do, you can add all the "hotness" you want by using HOT salsa, adding  chilies, ... or ... even adding JalapeƱo peppers until you're "SMOKING" hot!!

Yesterday, even though the following recipe is for a 9x13-inch dish, I doubled the amount of everything and assembled all in a sprayed 15" x 10" x 2" glass baking dish.  Believe me, they were VERY "cozily" packed together!  By pushing them "together",  I managed to get 14 down the length of the pan, and then stuck the last two in along the long edge.  Because these were so crowded, I made sure to separate them a little bit as I poured the sauce over the top.  By making this large batch (and having a crowded dish), I could get away with putting this tightly covered dish into the oven at 210-degrees for for a long 3.5 hours and come home to it turning out perfectly.

INGREDIENTS for 6-8 servings:

1 lb. boneless chicken breasts, cut into small cubes (or, if you prefer, cook the chicken breasts as they are and then shred the meat).  Using left-over meat from a rotisserie chicken would really speed things up with this recipe!
1 small onion, chopped  (optional)
1 tablespoon olive oil
...
8 of 8-inch flour tortillas
1 and 1/2 cups of grated Monterey Jack OR Mexican Blend cheese, divided.
1 and 1/2 cups of mild chunky salsa, divided --I used Tostitos brand, but home-made would maybe be the GREATest!  (Because I doubled the recipe yesterday, I ended up using all of the Tostitos 24-oz. jar, which filled 3 cups.)
...
1/4 cup butter
1/4 cup flour
1 of 15-oz. can chicken broth (I like MSG-free...as free as possible, that is.  Homemade chicken broth would probably be the very best!!!!)
1 cup of sour cream (I used Daisy brand, because of it not having "extra stuff" in it)

DIRECTIONS:

  1. In a frying pan, cook the chicken (and optional chopped onion) in the oil over medium heat until just done.
  2. Spread out the 8 tortilla shells.  
  3. In a little row, put 1/8 of the chicken pieces on each of the shells.
  4. Put about 1 and 1/2 tablespoons shredded cheese on the chicken pieces.
  5. Put about 1 tablespoon of the salsa on the "cheese row".
  6. Roll each tortilla up, putting them into a lightly non-stick sprayed 9x13" baking dish.  Set aside....
  7. In a medium saucepan, melt butter.  Stir in flour.  Stir until "bubbly" and smoothly mixed.  Gradually, whisk in the chicken broth, stirring constantly and watching that it doesn't scorch.  Bring to boiling, and let boil for at least a full minute.
  8. Remove from heat and add the sour cream.  Blend well.
  9. Pour thickened sauce over enchiladas in the dish.
  10. Top with remaining cheese. Or, you could jump ahead and do the the next (#11) step before layering with cheese.
  11. Drop dabs of the remaining mild chunky salsa on the top of all.
  12. Cover tightly with foil and bake at 375-degrees for 20 minutes OR until the cheese is melted and you see "bubbly" happening around the edges. 
*  At this point, you could double-wrap and freeze it until it is needed...well, within a month, or two?  When taking from freezer, you'd have to bake this considerably longer-- adjust the time accordingly.



Friday, November 15, 2013

Carrot - Pecan - Chocolate Chip Cookies


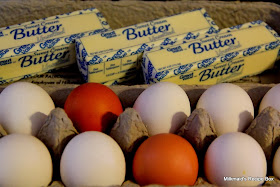
Get some eggs, get some butter...get started!


Time to to use up
some more CARROTS!!!


I took a pumpkin cookie recipe and 
converted the pumpkin to... CARROT!

Ingredients:

2 and 1/4 cups all-purpose flour
1 and 1/2 teaspoon pumpkin pie spice
1 teaspoon baking powder
1/2 teaspoon baking soda
1/2 teaspoon salt
....
1 cup (2 sticks) butter, softened
1 cup granulated sugar
*15 oz. puree'd carrots (probably 2 cups raw carrot slices to begin with?).  I can't believe I actually WEIGHED this!
2 large eggs
1 teaspoon vanilla extract
....
2 cups semi-sweet chocolate chips
1 cup chopped pecans (or chopped walnuts)

* If you want to save time and do NOT want to start out with RAW carrots, I'm sure you could open some canned carrots, drain and puree them.

Directions:  

Preheat oven to 360-degrees.  Line cookie sheets with parchment paper.  (The original recipe called for a 375-degree oven-- that's not okay with my oven!)

In a flour sifter, or a "screen sifter" like this,...


  • Combine flour, pumpkin pie spice, baking powder, baking soda and salt.  Shake it through the sifter to remove any lumps.  Set aside.
  • Beat butter and sugar together (until creamy) in a large mixer bowl.  Add puree'd carrots, eggs and vanilla extract.  Gradually, but thoroughly, mix in the flour mixture.  Stir in chocolate chips and nuts.  Drop by rounded tablespoonsful of dough unto a cookie sheet that's lined with parchment paper.  Because they did NOT "spread out" during baking like I expected they would, I got away with baking 12 on a sheet!
  • Bake for 15-20 minutes OR until edges are just lightly browned.  (My 360-degree oven needed about 19 minutes)  Cool on baking sheets for about 2 minutes before sliding parchment paper w/hot cookies onto table top to cool completely.  
  • Eat as is, OR drizzle tops with the frosting/glaze of your choice.  My favorite to put on top is this....


BROWNED BUTTER FROSTING:
Heat ½ (or 1/3?) stick of butter in pan only until golden brown in color (stirring all the while)-- this does NOT take long.  Quickly add about two Tbsp. milk to quickly stop the browning, and then add some SIFTED powdered sugar till you have the amount and consistency of frosting you need. You do not want this to be thick!   It may be necessary to add tiny amounts of more milk to get a smooth texture.   I drizzle this over the bars.  (You have to drizzle this on the cookies quickly before it thickens-- that's why I just line up the baked cookies and go 'back and forth' over their tops.)


The original recipe for these cookies came from the web address at the bottom of this posting, but, I substituted puree'd carrots for the can of pumpkin and then drizzled my favorite "browned butter" frosting on them...
http://www.verybestbaking.com/recipes/12833/pumpkin-spiced-and-iced-cookies/detail.aspx

Wednesday, November 13, 2013

Pecan-Topped Carrot Pie (Yes, CARROT!)


So, what do you do when you have about two laundry baskets of carrots, with a good number of them being MONSTERS?!?!  Do what I did?  Google "CARROT RECIPES"!!!!!!  

In my opinion, this pie ends up being a good "MOCK pumpkin pie"!!!
Check these out:
 The largest (the 10" x 4.5")
weighed 2.5 pounds!  Yes, POUNDS!
Thank YOU, Pam!!!!!!!!!!
Besides the "usual" uses for carrots (freezing, and canning), I found a variety of other recipes for carrots, some of which were very familiar-- soups, juice recipes, cookies, bars, cakes, etc.  And, then,... I found recipes for CARROT PIE!   I might have been "under a rock" too long--  but, I'd never heard of these!

INGREDIENTS:

2 cups cooked and then pureed carrots (maybe about 4 cups of slices to start with?)
1 of 14 ounce can sweetened condensed milk (not evaporated milk)
2 eggs, slightly beaten
1 and 1/4 teaspoon pumpkin pie spice
1/2 teaspoon ground cinnamon
Dash of salt (1/8 tsp.?)
1 unbaked pastry shell (9 inches)
.......................
Personal note:  I think(?) using just 1/2 of the following three ingredient amounts would also work to top the pie!
1 cup of chopped pecans 
1/2 cup packed brown sugar 
3 tablespoons butter, melted 

DIRECTIONS:
  1. Add 1 inch of water to a large saucepan; add carrots.  Bring to a boil.  Reduce heat; cover and cook for 9-11 minutes OR until tender.  Drain.  Cool.
  2. Puree the carrots in a food processor or blender.  When you think they are smooth enough, run them through a potato ricer or Foley food mill to make sure any lumps are removed.
  3. In large mixing bowl (I used my stand mixer), beat together the pureed carrots, milk, eggs, pumpkin pie spice, cinnamon and salt until well-mixed.
  4. Pour into unbaked pastry shell.
  5. Combine the pecans, brown sugar and melted butter.  Sprinkle over the pie filling.
  6. Bake at 375-degrees for 45-55 minutes or until a knife inserted near the center comes out clean and edges are browned.  (Right from the start, I make a ring of aluminum foil and cover the top edges of the crust to prevent overbrowning.) 
  7. Cool on a wire rack.  Refrigerate leftovers. 


The original recipe for the above pie came from:
xxxxxxxxxxxxxxxxxxxxxxxxxxxxxxx

P.S.  Below:  The recipe for the "bare-topped" Carrot Pie that can be seen in the background may be my husband's favorite of the two:
The recipe for the "bare-topped" carrot pie is made by pretty much following the same "directions" as for the pecan-topped pie, but the ingredients listed were: 

  • 2 cups cooked and then pureed (pulp-free, and lump-free) carrots (about 4 cups of raw carrot slices to begin with?).
  • 1/2 teaspoon pumpkin pie spice
  • 1/4 teaspoon ground cinnamon
  • 3/4 cup white granulated sugar
  • 2 eggs, slightly beaten
  • 2 cups evaporated milk
  • 1 dash salt

Original submitter's note:  If you double the recipe, you may be able to fill 3 of the 9" deep dish frozen pie crusts.   This original pie recipe came from Karla at:  http://www.justapinch.com/recipes/dessert/pie/grandma-roses-carrot-pie.html

Tuesday, November 5, 2013

Today was PIE day! (Cherry, and Blackberry)

Because I wanted to make room in one of the freezers today, I decided to make two pies-- one a cherry, and the other a blackberry.  Besides that, with the oven going, the kitchen warmed up nicely on this chilly Fall day...

For this cherry pie, I followed the recipe found at:


Because the cherries had been in the freezer, they were VERY JUICY when they thawed.  First thing, I took all of the juice and, in a kettle over medium heat, I "reduced" the amount of total juice from 2 and 1/4 cups, down to 2/3 cup.  (It didn't take all too long to do that.)   Once the juice amount was down to around 2/3 cup, I dumped the pitted cherries in, and heated them until "just boiling"-- then I added the blended mixture of sugar (I added only 1 cup of sugar) and cornstarch to the hot cherries.  Stirred until it was beginning to thicken.  Dumped all into the bottom crust.  Put the top crust on.  I proceeded and then baked  it according to directions on the website.   

Below:  I use a "cheater mold" for 
making a sort of lattice top...


Some of the cherries I used were "early cherries" 
(lighter in color); the others were "late 
cherries" (darker in color).  End result
was a pie with darker colored cherries.


Because the cherries were frozen, they are a 
little darker than usual, and some are just 
not "as round" as fresh cherries would
be in a ready-to-eat slice of pie like this.

(Some cherries looked more like a "flat tire",
but the regular taste was there.)


xxxxxxxxxxxxxxxxxxxxxxxxxx

The second pie for today, Blackberry, was made from the recipe


For this pie, I used "wild" blackberries that were frozen from over the summer.  Because they WERE still frozen, when going into the pie crust, I followed the advice of the "submitter" and baked the pie for an extra 20-25 minutes, and it worked just fine.  Your oven may be different, so check on the progress every 5-10 minutes after the originally suggested baking time.

As shown below, this top crust was also made with a "cheater" kind of pie crust mold-- this one, with the heart cutouts.  Others I have can be seen under the category of "gadgets I like" in the index list along the  right side of this blog.

Like one "reviewer" did, I also 
added an extra cup of berries.


It is time to have a piece of pie!