Friday, October 23, 2015

Nadine's Fresh Apple Cake (stays SO moist!)

Apple cake frosted with browned butter cream cheese frosting...

 Above and below:  Recipe baked in bundt pan.


 Below:  Recipe baked in 9x13" pan, 
frosted with "quicker" browned butter frosting.


If you happen to own an apple peeler like the one shown below
you will be able to get this cake into the oven with 
little effort and less time spent doing it.


My sister Nadine often brought a pan of this apple cake for us when she'd come up from Arkansas.  It is SO moist, and SO good!  Here's the recipe for it.  I'm happy that she shared it with me.

Ingredients and Directions 

Combine, set aside and let soak for 1 hour (some bakers skip this actual "soaking step" and just proceed as if they had "soaked" them):

4 cups peeled and chopped apples
1 cup "Omega" kind of vegetable oil (OR you favorite vegetable oil).
1 and 1/2 cups sugar  (Original recipe calls for 2 cups, but I did not miss the 1/2 cup I left out.)

~~~~

After the "soaking time" is up for the chopped apples in the oil and sugar, slightly beat 2 eggs and add to the apple mixture.  Also, add 1 teaspoon Vanilla, and stir in.

In a separate container, combine the following dry ingredients: 

3 cups all-purpose flour
2 teaspoons baking soda
1/2 teaspoon allspice (Opinion:  For the best tasting cake, do not substitute with any other spice.)
1 and 1/2 teaspoons cinnamon
1 teaspoon salt

Blend the dry ingredients into the apple mixture.


Fold in 1 cup raisins OR chopped dates and 1 cup chopped pecans OR walnuts.  (OR you can add flaked coconut, too!)  Tip:  If my raisins or dates seem too firm, I would just add them to the apple/sugar/oil soak at the beginning of this recipe.

Bake at 325-degrees for "about" 1 hour if you choose to bake this in a greased and floured Bundt pan.  

Optional baking method:  I sometimes bake this cake in a 9x13x2-inch greased and floured pan for just under one hour-- but check your cake for doneness with a toothpick or very clean/sharp knife at just under 1 hour.  If knife/toothpick comes out clean, it should be done.  

~~~~~~~~~~~~~~~ 

If you really want to put something on this cake and want a topping that seems  made-to-order for just this kind of cake, see the two options below..

Apple Cake GLAZE

Bring just to a rolling boil 1 can sweetened condensed milk (not evaporated milk), 1/2 stick butter and 1/2 cup brown sugar, packed.  Add 1 teaspoon vanilla or rum flavoring and stir well.  Pour this hot mixture on hot cake fresh from the oven and sprinkle with slivered almonds or pecans.  Cool.

OR

A "QUICKER" BROWNED BUTTER FROSTING:

Heat ½ stick butter in pan over medium heat and watch closely while stirring until the butter turns golden brown in color.  Then,...quickly add to the hot/browned butter about two tablespoons of milk to stop the browning, and then stir in some SIFTED powdered sugar till you have the amount and consistency of frosting you need.  It may be necessary to add tiny amounts of more milk to get a smooth texture.   I poured "ribbons" of this frosting from end-to-end over the still warm (but not hot) cake.   Once this kind of frosting hits the cake's surface, it cannot be spread without making a mess.  Again, you have to get this type of frosting onto the cake very quickly before it thickens too much to pour it on.

Oh, my goodness!!!!!-- this cake is so 
delicious with a browned butter cream 
cheese frosting, too!


This cake freezes well, too.


Tuesday, October 20, 2015

Our Favorite Chili (It's SO quick!)

I like the flavor of this chili!

Years ago, a recipe card for this chili was handed out when Qualheim's True Value in Shawano hosted a kind of promotional event put on by the Regal cookware company.  During the 'event', someone from the Regal company was in front of the store and serving free cupfuls of this chili recipe from a HUGE frying pan that was sitting over some kind of heat source-- honestly, the huge pan was something like 5-6' feet across.  (M-m-m-m-m-m, the chili-- tasted so good!!!) 

This is about the 'QUICKEST' chili ever!  To save 'preparation time' when cooking, I like to 'brown hamburger' ahead of time-- about 5# at a time,  bag it and freeze in 1# amounts.  Using the pre-browned and thawed hamburger, this recipe can be completed start-to-finish in the length of time it takes to cook the onion/green pepper mixture.  (20 minutes?)  Even if starting with raw ground beef, it's still quick!


I like to double this recipe so I'll have some left for the next day.

6 servings (maybe less if you have 'chili likers')

INGREDIENTS:
  • 1/4 cup chopped onion
  • 1/4 chopped green OR red OR yellow  OR orange pepper (optional)
  • 1 tablespoon butter
  • 1 pound lean ground beef
~~~~
  • 1 package (1 and 5/8 oz. size) chili seasoning mix (recipe called for French's)
  • 1 teaspoon Lawry's seasoned salt
  • 1/2 cup water
  • 1 can (15 oz.) kidney beans, with liquid
  • 1 can (15 oz.) black beans, drained (my addition, optional)
  • 1 can (16 oz.) diced tomatoes with liquid, OR stewed tomatoes, OR whole tomatoes
  • 1 can (4 oz.) sliced mushroom pieces, drained (optional)
DIRECTIONS:

Sauté onions and peppers of your choice in butter in a 10-inch fry pan over medium heat until onions are transparent.  While 'getting the onions ready', and if you are not using 'browned-ahead ground beef',  brown the raw ground beef in separate fry pan, and drain. 
 
(To speed everything along, you could start heating everything in the last group above over low heat while the onion/pepper and the hamburger is being readied.)
Combine EVERYthing. Mix well, breaking up tomatoes (if whole).  Bring to a very light boil, reduce heat to low and simmer uncovered for about 5-10 minutes (to make sure the beans are totally heated ).
 
*Once I get everything combined, and if  I'm in no hurry to serve, I'll put it into the oven at 340-degrees for about 30 minutes.  This is also a good crock pot meal.  Also, see note at far bottom of this posting.

This can be served with a variety of toppings:  Grated cheese, chopped green onions, snipped chives, or ???
▼    
▼    
SOUR CREAM......
▼    
 P.S.  I've seen cooks take a recipe like this, add a large can of tomato juice, a small handful of spaghetti strips that have been snapped into 1-inch pieces, and a can of corn for a different kind of dish-- adjusting the cooking time and amount of chili powder, as desired.

Friday, October 16, 2015

Cookies with Cranberries/Walnuts/White Chocolate Chips*


These cookies passed the "cookie 
tasting test" by everyone here.


Yield:  5 dozen  (This recipe can be easily cut in half to make 30 cookies) 

INGREDIENTS:
  • 2 Cups (4 sticks, or 1 pound) butter, softened
  • 1 and 1/2 cups packed brown sugar
  • 1 and 1/2 granulated sugar
  • 4 large eggs, at room temperature
  • 1 tablespoon vanilla
-----------------
  • 4 and 1/2 cups all-purpose flour
  • 1 teaspoon baking powder
  • 1 teaspoon baking soda
  • 1 teaspoon salt
-----------------
  • 2 cups sweetened dried cranberries (Craisins)
  • 2 cups white chocolate chips
  • 2 cups coarsely chopped walnuts or pecans


DIRECTIONS:

  1. Cream the softened butter in a large mixing bowl.  Beat in the sugars and the eggs, one at a time, beating well after each addition.  Add vanilla.
  2. In a separate bowl, combine and sift together the flour, baking powder, baking soda and salt.
  3. Stir the sifted dry ingredients into the creamed mixture, half at a time, until evenly mixed.
  4. Stir in the dried cranberries, white chocolate chips, and nuts.
  5. Cover bowl tightly and refrigerate for 2 hours, or overnight.
  6. Preheat oven to 350-degrees F.  
  7. Lightly butter two large baking sheets OR line them with parchment paper (I used the parchment paper method).
  8. Shape dough into 1 and 1/2-inch-diameter balls. 
  9. Place the balls on the baking sheets, leaving about 2 and 1/2" inches between each.  
  10. Bake one sheet at a time on the center rack in the oven for ABOUT 17 minutes.  (They take longer to bake because they are cold to start with.)  Since ovens vary in temperatures, check the baking process to control how you want yours to look.
  11. When done, the edges of the cookies should be a light golden brown and the centers lighter in color.  Don't over-bake-- they will sort of "bake" a little bit more on their hot pans after coming out of the oven.
  12. Cool cookies for about 5 minutes on their baking sheet and then transfer them to a rack to cool completely.  Store in an air-tight container.  I like that the moisture in the cranberries helps to keep the cookies more moist.  Enjoy!


*  I adapted (and doubled) this recipe 
from one in The Old Farmer’s Almanac 
Everyday Baking cookbook

Wednesday, October 14, 2015

Thick Potato 'n Ham Soup

Seriously,... I wonder how many times 
in a row I could eat this before I'd say, 
"No, I think I'll have something else!"


But, when you see the ingredients 
(especially the butter, whole milk and 
the heavy cream), you might say,
"Take it easy on the soup!"

Serves 6-8

INGREDIENTS:
  • 8 med. potatoes, peeled and cubed to the size you like.
  • 1/2 cup celery, diced
  • 1/2 cup onion, finely chopped
  • 3 cups cooked ham, cubed or diced
  • Salt and pepper to taste.
  • 10 tablespoons butter
  • 10 tablespoons all-purpose flour
  • 2 cups heavy cream
  • 2 cups whole milk (or half 'n half)
  • 2 cups cheddar cheese, shredded or thinly sliced (to be used as a topping)
DIRECTIONS:
  1. Cook potatoes in generously salted water until tender.  Drain well and set aside.
  2. In a separate and rather large saucepan, melt butter over medium-low heat, watching it carefully.  
  3. Add celery, onion, salt and pepper to the melted butter. 
  4. Whisk in flour, stirring constantly for 1-2 minutes or until the celery and onions are tender and the flour has cooked slightly.
  5. Slowly whisk in the milk (or optional half 'n half).  Continue whisking until mixture begins to thicken.
  6. Add heavy cream and continue stirring until soup is very creamy.
  7. Add diced/cubed ham and cubed potatoes and stir until blended.
  8. Add more salt and pepper if needed.
  9. Serve in cup or bowl and top with cheese.


This soup might be is "rich", 
but, ...I say it is SO worth it!

(I could see where a very small 
amount of thin slices of carrot 
would add a tiny dash of color.)


Tuesday, October 13, 2015

EZ Chick Meal

This is so EZ, so quick,... 

no exact recipe is needed...

  • First, I lightly sprayed my old speckled enamel navy blue roasting pan* with non-stick spray.   Set aside.
  • Secondly, in a large frying pan with oil, I browned both sides of the "bare/rinsed off" chicken thighs (thighs with skin on, bone in).  This step did NOT take very long!
  • Thirdly, this is what I put into the sprayed roaster pan:
  • 1 large onion, sliced into long strips (end-to-end, or pole-to-pole)
  • Peeled and "quartered" potatoes-- enough to serve however many people you wish to serve.
  • Large carrots, scraped and sliced.
  • 4 cups chicken broth.
  • On top of the veggies, I arranged the browned chicken thighs and sprinkled all with salt and pepper.
  • Cover with roaster cover (or cover tightly with foil?), put into 300-degree oven and set the oven for 3 hours.  M-m-m-m, so easy, so good.  (I'm sure this would be just as good with using a slow cooker, but it would just take a bit longer.)
IF you want to, you could drain whatever chicken broth is left in the roaster, thicken it, and use it for gravy.  


That's all, folks!

* The large blue speckled/enameled roaster I used was one of my wedding presents 52 years ago--  I love it with "old friends" like that just keep hangin' around my kitchen.

Here it is, again, in less light...

Monday, October 5, 2015

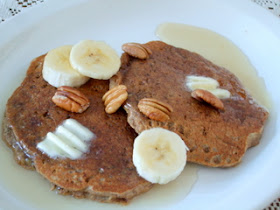
Whole Wheat Banana Nut Pancakes

                                                                         Photo by Doris

Okay,... so I sometimes think I won't be 'doing this' (posting recipes/photos) too often because my most favorite recipes are already posted,... but, ... but, ... but, then I leave the 'door' open that I just m-i-g-h-t sneak one in here and there.   And,...I'll tell you what prompted me to do it.   I was reaching for a box of All-Bran cereal.  At the same time, I'm still hearing remembering two of my grandchildren describing this kind of cereal as looking like chicken feed ("chicken mash", they said, after the milk is on it for more than a minute)!  Even though I'm not crazy for the flavor and texture of this very plain kind of cereal, it's what I'll do because I know fiber is good for me (good for many).  BUT!, with the box already in my hand and making its descent from the cupboard this morning, I couldn't help but see the notice "New Recipe on Back"-- well, of course, I had to give that a look!

Ah-h-h-h, a couple of things factored into my next decision-- the picture looked gooooood, I was very hungry, I happened to have every one of the listed ingredients on hand, a-n-d, ... since I was already planning to eat the bran, why not eat it like this!?!?!  So, ... I did...and I will be putting the recipe for these on my list of 'favorite things to make for breakfast'.  They also passed the 'taste testing' from my hubby.  They're a mix of pancake/banana nut bread, etc.  I'm not done, yet!-- with adding a little butter and 100% maple syrup made from our own trees on this farm, my description is a simple "M-m-m!'

Some might say these are 'heavy', but I say it's more that they are "filling" (satisfying)-- two were great plenty for me. 
Yield:  I think I ended up with 10 of these 4.5" pancakes.

INGREDIENTS:
  • 1 cup 100% whole-wheat flour
  • 1/2 cup Kellogg's All-Bran Original cereal
  • 2 tablespoons packed brown sugar
  • 1 teaspoon baking soda
  • 1 teaspoon ground cinnamon
  • 1/4 teaspoon salt
  • 1/4 teaspoon ground nutmeg
  • 1 egg, slightly beaten
  • 1 and 1/4 cups milk
  • 1 tablespoon ground flax seed (optional)
  • 1 medium ripe banana, mashed (about 1/3 cup)
  • 1/3 cup chopped pecans or walnuts
  • Maple Syrup
  • Banana slices and additional chopped nuts for garnishing (optional)
DIRECTIONS:
  1. In a bowl, combine the flour, Kellogg's All-BRAN Original cereal, brown sugar, baking soda, cinnamon, salt, and nutmeg.  Mix together.
  2. In a second bowl, combine the slightly beaten egg, milk, ground flax seed and mashed banana; stir until well combined.  Add the wet ingredients to the flour mixture and stir only until just combined.
  3. Stir in the 1/3 cup chopped nuts, optional
  4. Pour about 1/4 cup batter* onto a hot, lightly greased griddle or into a skillet.  Cook over medium heat for about 2 minutes on each side or until pancakes are golden brown**, turning to second sides when pancakes have bubbly surfaces and its edges are slightly dry. 
  5. Top with syrup, banana slices, and additional nuts, if desired.
*  I like to use my larger cookie scoop for this because it's about the same size and the batter dumps from it so easily (I guess it has no choice when I shove it out with the lever).

**Remember that with using the whole wheat flour, we already have a 'darker batter'-- so, when they say "golden brown", it's a little different look than we'd have when making all white flour pancakes.  Don't have the heat so high that they get 'dark' before they're done in the middle.
 ▼

Leave nuts out of the batter and off the top if you have a 'non-nut liker' in your group...
P.S.  I make up a double batch of these, cool each pancake on a wire rack, then layer 'em  between squares of Saran Wrap or waxed paper.  Next, I stick those little stacks in a Ziploc and I can freeze them, or just refrigerate them for enjoying over the next few days.  It's so convenient to pull one or two out, put 'em in the toaster and... ENJOY!!!   Some mornings, I take one of these (okay, maybe two!), fold it in half with a thin layer of natural peanut butter in between.  I liked that, too.

Whole Wheat 'n Oats Banana Pancakes

Don't let the '12-ingredients' part stop 
you from making these!  
They are easy, and............ I LIKE!
A BONUS:  You'll KNOW what's in THESE!*

*I remember attending a meeting held in the auditorium of the high school in Shawano when the lecturer said something like this about the packaged/convenience food we buy:  "If your first and second grader children cannot (or could not) pronounce the words in the ingredient list, don't buy it, don't eat it!"
----------------------------------

If you like a combination of banana, peanut butter and chocolate, do this:
Above:  Use the same recipe for the pancakes, but drizzle them with a 2:1 ratio of pure maple syrup and creamy peanut butter.  Oh, ...and top 'em with a KISS! (Depending on the quantity you want, use twice as much syrup as peanut butter.)

INGREDIENTS:
  1. 1 cup old-fashioned rolled oats
  2. 1 cup whole wheat flour
  3. 3/4 cup all-purpose flour
  4. 2 tablespoons dark brown sugar (I used 'light' because that's what I had)
  5. 2 teaspoons baking powder (I use the aluminum-free kind that's now readily available)
  6. 1/2 teaspoon baking soda
  7. 1/2 teaspoon salt (Kosher is good)
  8. 1 whole egg
  9. 2 cups whole milk (I used 2%)
  10. 2 tablespoons coconut oil, plus a bit more for the griddle
  11. 3/4 teaspoon vanilla extract
  12. 1 banana, coarsely mashed
You could also add chopped nuts to the batter if you wish.

DIRECTIONS:
  • Place the rolled oats into a mini food processor or blender.  (I put the oats into a pint jar and then used my regular 'big boy' blender.)  Blend until it is the texture of coarse flour.
  • In a large mixing bowl combine the ground oats, wheat flour, all-purpose flour, brown sugar, baking powder, baking soda and salt.  Set aside.
  • In a large liquid measuring cup or bowl, whisk together the egg, milk, vanilla and coconut oil (because my coconut oil was cool and sort of 'solid', I measure out the amount and just barely warmed it back to 'liquid state' before adding it).
  • Mash banana coarsely and add to liquid mixture; stir in.
  • Pour the wet ingredients into the dry and stir (or whisk) just long enough to combine.  
  • Let the batter sit for a few minutes while the griddle heats up.
  • Spread a little coconut oil over a hot griddle.  Use a quarter cup to measure out pancake batter onto the preheated griddle.  
  • Flip once the bubbles begin to pop and no longer fill back in with batter.  Keep warm and repeat with the rest of the batter.
Let's have some...


Thanks for stopping by!
This recipe adapted from www.simplyscratch.com