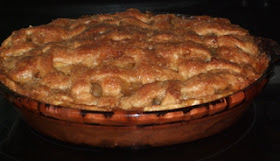
This originally started out to be something called Grandma Ople's Pie. This might look like a regular pie* (sort of?), but I now call it my "Apple Crisp Pie" because of the way I changed how I like to make it. There are actual recipes on the Internet for "Apple Crisp Pie", too, but mine looks still different than those, too.
Instead of a crumbly topping being sprinkled on and becoming 'crisp' as with a usual recipe for an apple crisp, it's the "brushed" lattice work crust that is the 'crisp' in this case...
If you don't want to bake this recipe in a PIE dish and use a double crust, you could put the apples in a sprayed/buttered 9x13-inch baking dish, pour 3/4 of the sauce evenly over them, top with a crust and brush the remaining 1/4 of sauce on that (lattice style crust works best because it lets the excess sauce drip through to the apples as they cook).
Above: Because I didn't use all Granny Smith apples, you can see that the slices did not stay very defined-- plus, I baked this 'pie crisp' for an extra 10 minutes. Some people do NOT like to see apple slices 'too cooked' like this, but I do.INGREDIENTS NEEDED (for pie form):
- One recipe of pastry for a 9-inch double crust pie (use your favorite recipe; mine is listed under 'pie crust' on the right side of my blog's home page). The following mix is the same as in Grandma Ople's pie, but then I change to 'my own directions' with the sweet sauce (syrup?).
- 1/2 cup (1stick) butter
- 3 tablespoons all-purpose flour
- 1/4 cup water
- 1/2 cup white sugar
- 1/2 cup brown sugar
- 1/2 teaspoon ground cinnamon, optional
7-8 average sized Granny Smith apples, peeled, cored and sliced. (The pictures in this posting are of when I used only four Granny Smiths, and some of another softer/sweeter
variety-- if you like a 'tart' kind of crisp, use all Granny Smiths; if you do not like 'tart', use a combination of yellow delicious and another sweeter apple,)
DIRECTIONS:
- For a regular Apple Crisp Pie, place the bottom crust into your 9-inch pie dish, cover and set aside.
- To prepare the sauce (as listed above): Melt the butter in a saucepan. Stir in flour to form a paste. Stirring constantly, add water, white sugar and brown sugar, and bring just barely to a boil. Immediately, reduce heat to lowest setting and let it 'simmer' like that while you prepare the apples.
Even the peelings are BEAUTIFUL!!!
- For pie form, fill the bottom crust with apple slices, mounded slightly (mounded maybe by an inch or two).
- Slowly pour about 3/4 of your warm butter/sugar mixture evenly over the apple slices so that it can seep through the slices.
- Cover with a lattice work crust. As you can see in this next photo, the hurry-up in this 'non-perfectionist' does not have the lattice work woven correctly, but, believe me, that is not going to show up, nor matter, once this pie is done. IF I thought this was going to be critically judged, I'd make sure those 'weavings' were done as perfectly as possible. Besides that, Martha Stewart will not be stopping in today!)
- Personally, I like doing the following: Very slowly and evenly, pour (brushing works better) the remaining 1/4 of your buttery/sugary mixture over the TOP of the lattice work crust, covering it evenly-- this will make the crust 'crisp'-- thus the name Apple Crisp Pie.
- Set pie dish on a parchment paper (see my note about parchment paper under 'Gadgets I Like') or on a foil-lined cookie pan (pan with an edge, for just in case) and bake as directed below. Placing the dish on paper/foil will save you the job of cleaning the oven if some of the apple juice and syrupy stuff runs off or bubbles over, ... like this...
Above: This 'dripover' scrapes off very easily as soon as the pie is out of the oven (see first picture at the top of this posting).
- Bake in a 425-degree oven for only 15 minutes; then reduce temperature to 350 degrees. Continue baking for 45-50 minutes, check it. (With my oven, when I'm using 'double crusts', I have a better experience when I bake this pie on a rack that's one notch lower than middle so the bottom crust will bake better.)
*This was originally intended to be like "Grandma Ople's Pie", and, even if the sauce ingredients have mostly stayed the same, it's now just a little different.


No comments:
Post a Comment