Milkmaid's Recipe Box

FOOD, FOOD, FOOD! I'm such a FARMER at heart-- even a CALF knows that so much in life is about the FOOD! (A bit of a "bio" about me can be found way down near the bottom.)

You can find a recipe index entitled "Labels" down along the right side, starting below the picture of the farm. Then, below the "Label" list are pictures of some of my old "standbys"-- click on their picture and it should take you to the recipe.

You will see no advertising on my blog; this means there is no monetary benefit for me having "visitors" or "joiners"-- having said that, if you do wish to JOIN my blog, you can do so by scrolling w-a-y down to near the bottom of the page...

My Visitors

Locations of Site Visitors
Showing posts with label Candy. Show all posts

Wednesday, November 29, 2017

Chocolate Covered Peanut Butter Balls

EASIEST candy-like treats to make?   COULD BE!


The addition of Rice Krispies makes 
these lighter and more crunchy 
than some other recipes 
for Peanut Butter Balls.

INGREDIENTS:  (This recipe makes close to 100 "candies"-- if they are small.)
  • 3/4 cup butter (this is 1 and 1/2 sticks)
  • 2 cups chunky peanut butter (this equals a 16-oz. jar)
  • 1 teaspoon vanilla.
  • 1 pound of powdered sugar.
  • 3 cups Rice Krispies cereal (some people crush it a little bit before adding, but I did not).
CHOCOLATE DIP:
  • 2 ounces shortening (you could substitute 2 oz. paraffin wax for this, but I did not).
  • 1 of 24 ounce bag of chocolate chips (semi-sweet chocolate OR milk chocolate OR a combination of both).
  • Decorative sprinkles, optional.
DIRECTIONS:
  • Melt butter and, while hot, stir in the chunky peanut butter.
  • Mix well.
  • Add vanilla, powdered sugar and Rice Krispies.
  • Work in with hands until it will form small balls (balls that are about 1" in diameter).
  • NOTE:  If the mixture seems too dry, even like in the photo below, it will still be okay. Just gather it up, give it a squeeze or two and work into "ball shape".  Continue on with the rest of the directions...
  • Chill the shaped balls on waxed or parchment paper for about thirty minutes so that they are easier to handle when dipping.  (In the cold months, our winter-cold porch makes this so quick 'n easy.)
  • Add the 2 oz. of shortening to a microwave-safe bowl with the chocolate chips.
  • Microwave for only one minute at a time-- stirring in between.  DO NOT let these BURN!
  • When totally melted and smooth, you are ready to start dipping.
  • Stick a long very thin wooden skewer into the side of a chilled peanut butter ball and roll in the chocolate, or spoon the chocolate over the ball with a spoon.
  • Let excess chocolate drip off before placing them back onto the waxed paper.  (If you want any sprinkles on top, do it immediately while the chocolate is soft.)
  • Set aside until chocolate coating hardens...  
  • I don't know if it's necessary or not, but I store them in the refrigerator until about 30 minutes before serving.  
Next time, I am going to use a very small
"cookie scoop" when making these-- that way,
the balls will be more uniform in size.
(It's all about the "looks", you know! ☺ ) 
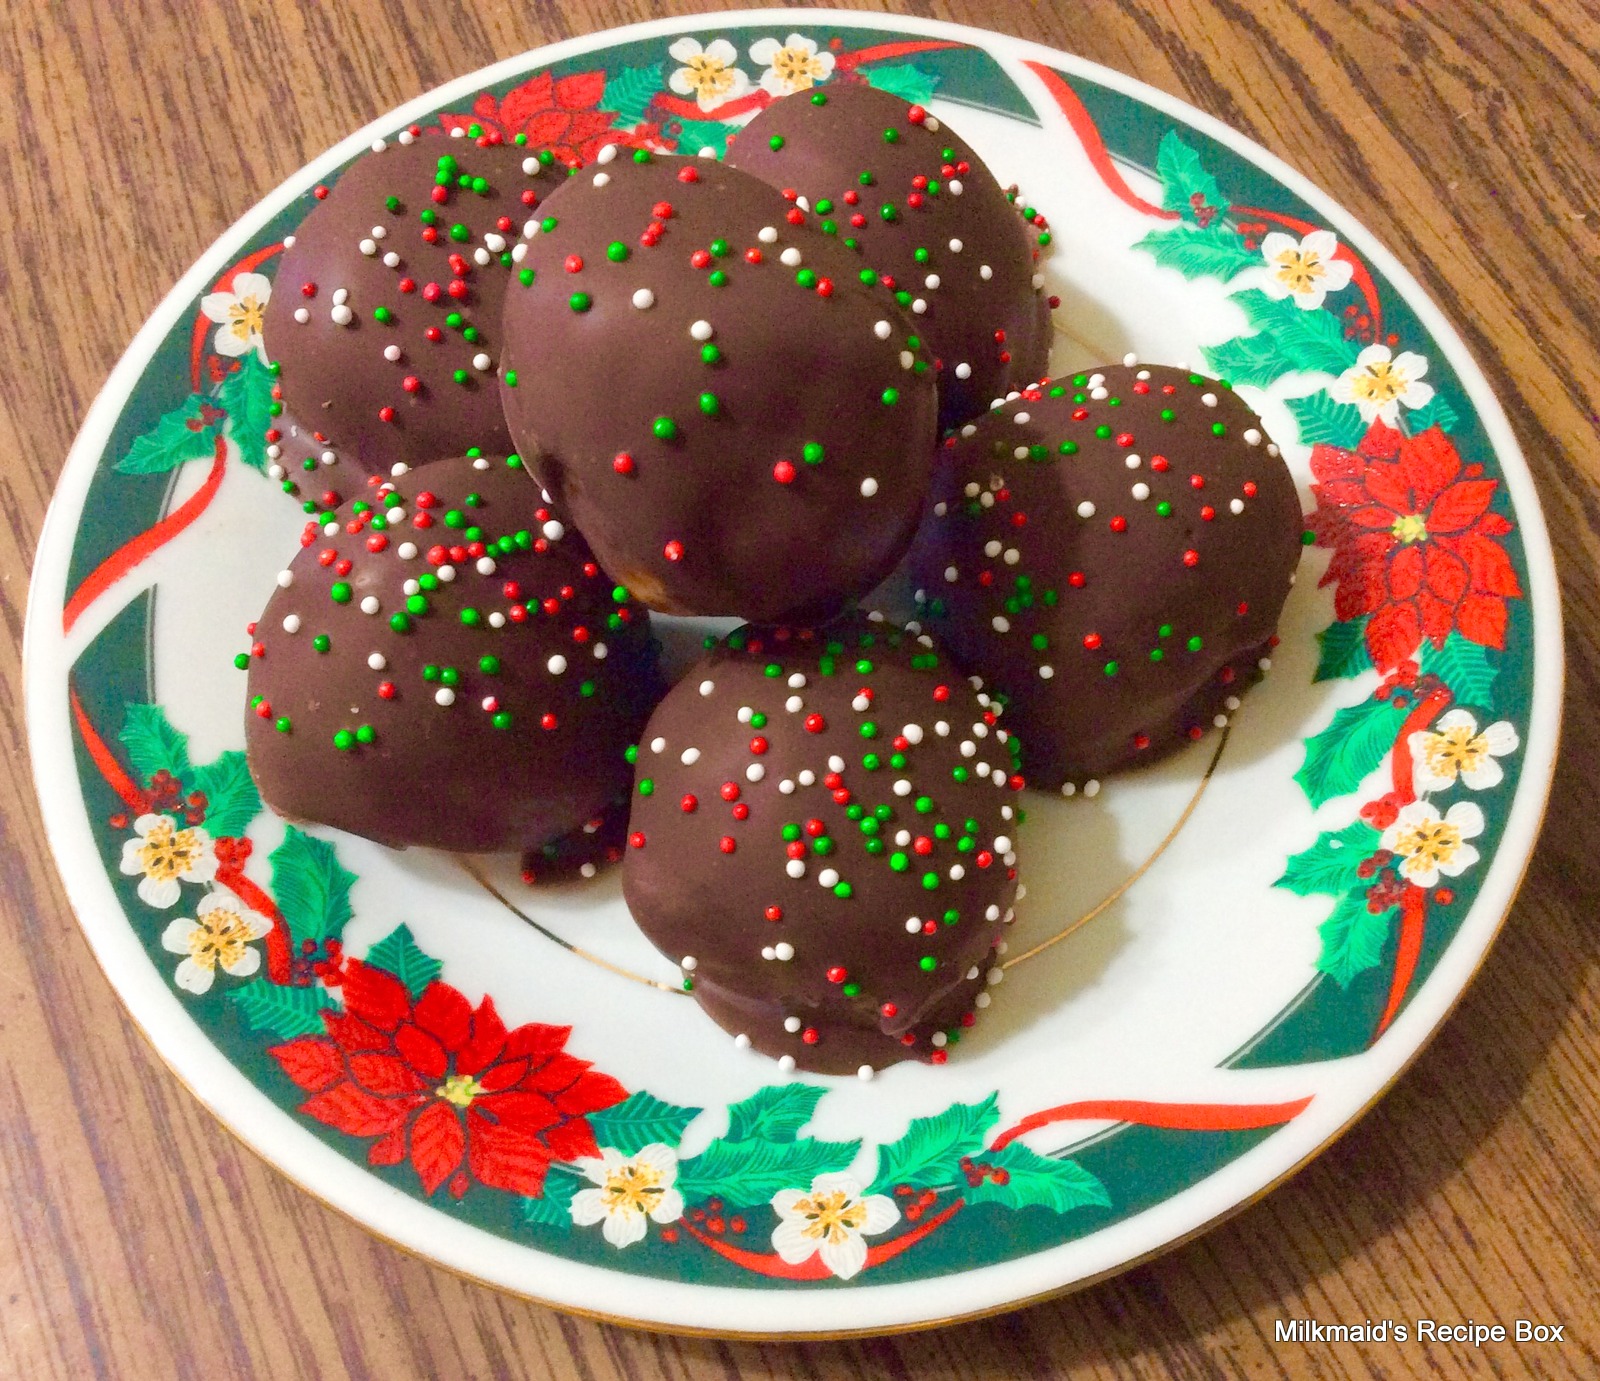
If you just want to send a little "thank you"
to someone for no special reason, sprinkle
little "♥" decorations on their tops... like this:
♥♥♥♥♥♥♥♥♥
The End!

Tuesday, December 16, 2014

Caramel Corn*


INGREDIENTS:

1/2 teaspoon SALT
1 cup BUTTER
2 cups BROWN SUGAR
1/2 cup light CORN SYRUP
...
1/2 teaspoon BAKING SODA
...
5 quarts POPPED POPCORN

DIRECTIONS:

Pop corn until you have 5 quarts of popped corn.  Put into a large bowl, and set aside.
  1. Put salt, butter, brown sugar, and corn syrup into a heavy-bottomed pot, and stir constantly.  Bring to a boil over MEDIUM heat--  then, continue to boil (a "boil" that can't be stirred down) for only 2 minutes.  While all of this is happening, just keep stirring all the while and make sure nothing is sticking/burning on the bottom of your pan. (Be careful-- this mixture is so very hot!!!)
  2.  Remove from heat and stir in the baking soda which will cause it to change color a little and foam up. 
  3. After the baking soda is stirred in, pour the very hot mixture over popped popcorn and GENTLY mix --lifting from the bottom and coming up through the kernels until popped kernels are well coated.  (Vigorous mixing would break the fragile kernels up too much.)   
  4. Put coated popcorn on a large baking sheet (about 16-inch by 11-inch?) that was ever so LIGHTLY sprayed with non-stick spray.  
Below:  Because I made a double batch, I had two pans...

5.  Bake in a pre-heated 250-degree oven for 1 hour, but you must gently lift/stir it (to sort of separate the "clumps") EVERY 15 minutes.
6.  At the end of 1 hour, remove from the oven; stir for the last time and let the caramel corn cool in the pans. 
7.  When cool, dump into a large bowl and gently break up the largest clusters before putting into whatever kind of containers you choose.

*Recipe from Smurawa's Country Bakery in Pulaski, WI, and you can find them right here: http://www.smurawabakery.com/

Can you imagine ANY small-town bakery selling 20,000 Paczkis on "Fat Tuesday" like they did last year?  Well, check this out:  http://www.smurawabakery.com/paczki-day    (Oh, those "Polish things" are SO GOOD!!!!)

Saturday, December 13, 2014

(Caramalized) Browned Butter Krispie Treats

 My new FAVORITE "way" 
for making Krispie Treats...
As of right now, I am all done with making Krispie Treats the "regular way".  I'm all over the taste that comes from making one little change to the original recipe-- that "little change" is letting the butter brown a bit before adding the marshmallows!

Makes:  1  of 9x13" pan, plus 1 of 8x8" pan.  Perfect sized batch for pot luck affairs-- take the 9x13-inch, and keep the 9x9-inch for "future use"--and, I think we all know what THAT "future use" means!   (BUT!,... if you DO only want to make a small batch, use the ingredient number that is printed in blue.)
INGREDIENTS:
  • 12 oz. (or 3 sticks) unsalted butter, plus a little extra for greasing the pan. (4 oz. or 1 stick)
  • 3 bags of 10.5 oz. mini-marshmallows (1 of 10.5 oz. mini-marshmallows)
  • Optional, a dash of vanilla?
  • 3/4 teaspoon coarse sea salt-- omit this if you used salted butter.  (1/4 teaspoon salt)
  • 18 cups of dry Krispie cereal.  (6 cups dry Krispie cereal)
DIRECTIONS:
  1. Butter the pan(s) you plan to use.
  2. Measure the cereal into a large bowl right now so that it's ready at the end.
  3. In a large pot-- preferably one with a thicker kind of bottom, melt butter over medium-low heat.  It will first melt, then foam, then turn clear golden and finally start to turn brown and smell nutty.  Watch VERY closely-- stirring all the while, and scraping the browned bits from the bottom of the pan as it starts to darken.  This butter can go from "light brown" to burnt in a hurry--  so watch it closely to prevent that from happening.
  4. When butter is evenly browned (or turns a nutty color), turn off the heat, remove from burner and quickly stir in the marshmallows to keep the butter from continuing to darken with its own heat. 
  5. Turn heat back on to LOW and keep stirring the marshmallows into the butter mixture until all is smoooooooooooooth.
  6. Turn off the heat, again. Remove the pot from the stove and stir in the salt.  OPTIONAL:  You could also also add a scant teaspoon of vanilla (1/4 teaspoon) at this point. 
  7. Dump this hot mixture over the Krispie cereal and mix well, very gently working the cereal up from the bottom of the bowl and to the top until all is coated.  
  8. Scrape this coated cereal mixture into the prepared pan(s) and press down lightly.  If necessary, butter hands to gently press mixture flat. Let cool, and cut into squares or bars.

My interest in making these treats like this started a few months ago. Both my daughter and I were asked to take something to church for a funeral dinner-- me, a casserole; her, some bars.   She made these.   Well, after all was over, she asked me to take her container home with me.  Since there were a few Krispie Treats left in her very large pan, I.................... helped myself.  I immediately concluded they tasted better than any I'd ever made.  I asked her what she did differently.   At first, she couldn't think of anything-- then, she asked, "I wonder if it is because I let the butter brown a little bit before adding the marshmallows?"  YES!, that had to be it.    After that, while checking around on the Internet, I found actual recipes calling for doing that-- yes, letting the butter brown before continuing with the recipe!!!  From now on, I will always be making these  like this!

Friday, October 5, 2012

Rocky Road Fudge (Makes almost 5 lbs.!)

Above:  I love 'loaded' fudge-- if you don't, 
you can control that by altering the recipe.

This great (and easy) fudge recipe came our 
way from Paula-- thank you, Paula!


IF you just so happen to know anyone who likes 
fudge,... this is an easy 'GIFT-y" item.

Above: For those who do not like (or cannot eat) nuts, 
add only the mini marshmallows.
I sometimes put the above variation of fudge mixture in 
the 8x8-inch dish; then I quickly add the walnuts 
and fill the 9x13-inch dish, as shown below.

Above: Fudge with a lot of walnut pieces, 
plus the mini marshmallows.

```````````````````````````````````````

Before you begin this recipe, generously butter a 9x13-inch AND an 8x8-inch baking dish for when the fudge is done.

1.  Put 3 cups miniature marshmallows in a shallow container and put into freezer--- freeze until "FROZEN".  You'll add these at the end.  (You can put these in the freezer way ahead of time, if you wish.)  These are frozen ahead of time so that they won't quickly melt INTO the fudge when they're added at the end.

```````````````````````````````````````````

2. In a large heavy saucepan, combine the following three ingredients, heat just until melted and blended together and set aside (you could microwave these in a microwave safe bowl for one-minute increments until it's all melted and blendable):
  • 20 oz. total (three of the giant-sized?) Hershey OR Symphony OR Dove milk chocolate candy bars (broken into pieces)

  • 12 oz. bag of semi-sweet chocolate chips (I prefer the Ghirardelli brand)

  • 1 cup butter (cut into pieces)


``````````````````````````````````````````

3.  Combine the following three ingredients:

  • 4 cups white granulated sugar
  • 1 can (or 1 and 2/3 cups) evaporated milk
  • 2 and 1/2 cups miniature marshmallows (not the ones you have frozen) and bring to boil over medium heat. 


Stir constantly to prevent scorching on the bottom.  Continue to cook and stir at a light but steady boil for 7 minutes.  

Remove from heat immediately after 7 minutesPour this very hot mixture over the "set aside" chocolate/butter mixture in the heavy saucepan or bowl.

With a wooden spoon (preferably), stir until chocolate/butter is melted and the mixture is well blended.  Continue to stir* until candy loses 'SOME' of its shine. 

After  few minutes(?), when it has lost 'some' of its shine, stir in the still-frozen 3 cups of miniature marshmallows2 teaspoons vanilla, and 1 pound (or less, or none?) walnut halves (once the frozen marshmallows have been added, you don't want to stir long enough to make them soften/melt-- but, to keep their shape).

* If you stir for too long after it loses some of its shine, the fudge will, almost in an instant, start to firm up too quickly and you won't be able to incorporate the frozen marshmallows, vanilla and walnuts.

Immediately pour into the two buttered pans-- one a 9x13", and the other an 8x8".  Cover with Saran wrap, and refrigerate for at least 2 hours before cutting.  Keep refrigerated until ready to serve.  (Better yet, double-wrap unused portions first in Saran wrap and then aluminum foil.  Freeze in an air-tight container.  It will stay 'good' for a long time-- IF it survives! ) 
Ah-h-h-h-h-h-h-h-h-h................
 

Wednesday, April 11, 2012

Microwave Caramel Corn

Do you like the 'goodie in a box' known as 
 Fiddle Faddle?   This is close!


This recipe makes about 3 quarts.  At first glance, it might look like there are 'too many' steps to making this, but ...it really did not take long!

INGREDIENTS

  • 3 quarts popped corn (hulless popcorn also works well)
.............
  • 3/4 cup peanuts* (less, or more, as desired).  Some add pecans instead of peanuts.
  • 1 cup packed brown sugar
  • 1/2 cup (1 stick) butter
  • 1/4 cup light corn syrup
  • 1/2 teaspoon salt
* On the container for the peanuts I used, it reads:  Dry roasted peanuts, lightly salted with 100% sea salt, no MSG.   I've already made this recipe without adding any peanuts and it was liked that way, too.  (This additional note was added on June 25, 2012)
...................
  • 1/2 teaspoon baking soda

DIRECTIONS

  • Pop corn.  Place popped corn and peanuts in large brown grocery store type paper bag. Set aside.
  • Place brown sugar, butter, corn syrup, and salt in a 3 quart glass bowl.  Microwave at high setting 3 - 4 minutes, stirring after each minute, watching for when mixture comes to a boil. Microwave 2 minutes more while 'boiling'.  Remove from microwave.
  • Stir in baking soda.
  • Pour syrup mixture evenly over popped popcorn and peanuts in brown bag. Close bag and shake well.
  • Fold top over and place brown bag in microwave and microwave at high setting 1 and 1/2 minutes. Shake bag well. Microwave 1 and 1/2 minutes more. Shake bag, open bag and pour caramelized popcorn into large roasting pan or bowl. Toss bag in garbage. Cool and stir to separate kernels.
  • Store in airtight containers, or 'zip-like' bags.

Come on, ... dig in!


 Adapted from old Farm Journal recipes (submitted by Lisa Parker).


Monday, January 9, 2012

CARA-MALLOW BALLS

M-m-m-m-m, so much like a little ball of Rice Krispies treats, but,...
 with a caramel twist!
Through the years, I'd clip recipes from our farm papers and magazines-- stick 'em in a folder for 'some day', which turned into 'many days'.  By now, many of the papers have 'yellowed'.  Last week, while looking through that same folder, I experienced a memory flashback when I found this recipe for something we'd made in R. S. so, so long ago.  Since I had everything I needed, I took a trip back to the evening when we made them in the 'old (late) meetinghouse' out in the country.  Here...........is............the simple recipe for them:

Yield:  About 55 'treats'

INGREDIENTS:
  • 1 of 14 oz. package light caramels  (These days, the bags of caramels are smaller and have less caramels.  I suggest you weigh the caramels to get 14 oz.  In my case, I had to add 8 or 9 caramels to get the weight up to what the packages used to have. ) (I prefer Kraft because they seem easier to unwrap.)  
  • 1 stick (8 tablespoons) butter
  • 1 can sweetened condensed milk
  • 1/2 teaspoon vanilla
  • 1 bag (16 oz.) large marshmallows (I did not use the bigger jet-puffed kind).
  • Rice Krispies (or, the equivalent in your favorite brand).

DIRECTIONS:

This recipe goes better if there are TWO people--  one to dip the marshmallows in the caramel, and another person to roll in and coat with the crisp rice cereal.  that way, cereal doesn't end up in the container of warmed caramel.
  • Unwrap caramels.  (Well, ... to save 'melting time', I lined them up on a cutting board and, using a very, very l-o-n-g  knife,  sliced them in half--  but, that isn't necessary.)
  • Melt caramels, butter, condensed milk and vanilla in the top of a double boiler, stirring until all is melted together and smoooooooooth.  (That would work just fine, but... this is how I did it:  In a microwave safe bowl, I first microwaved just the caramels for only 1 minute on high to soften them; then, I added the condensed milk, butter and vanilla.  Microwaved, again-- checking 'progress' after each 30 seconds, stirring, and then declaring it 'done' after all was melted.  Once melted, it took a minute or so to get the 'floating' butter smoothly blended (whisked) INTO the caramel/milk mixture, but, with patience, it all came together just fine.)
While still warm, use a kind of 'pincher/grabber' thing and dip marshmallows into caramel mixture, turn to coat.
  • Move coated marshmallow(s) to bowl of Rice Krispies, roll to coat...
  • Transfer to foil, waxed paper or parchment paper-lined area to cool.  I like them to 'cool' overnight ("overday"?) so that the caramel coating has a chance to firm up.


Thursday, December 22, 2011

Peanut Butter Candy Bar Squares


I saw this recipe on the Betty Crocker website a few years ago, but I've changed it up just a tiny bit.  If I hadn't gotten the peanut butter cookie mix* at a really good sale price, and didn't already have the 14 oz. bag of caramels on hand, I would NOT have given this 'sweet/nutty' recipe a second look.  But, I did............. so,.............. I did! 

*This is the FIRST time in my life that I've bought any kind of cookie mix.  Truthfully, I could never see a reason always wondered why anyone would buy a 'cookie mix' when cookies are so easy to make from scratch.  Well,... I now have an idea as to a possible why--  it could be because some recipes ASK that a mix is used.  Like this one...

Suggestion:  Unwrap the caramels before you start anything.

Ingredients for the Base Layer:
  • 1 pouch (1 lb. 1.5 oz) Betty Crocker dry peanut butter cookie mix
  • 3 tablespoons vegetable oil
  • 1 tablespoon water
  • 1 egg, slightly beaten
  1. Heat oven to 350 degrees
  2. Spray bottom only of a 13x9 baking pan/dish with cooking spray.  (I sprayed the bottom, then lined the dish with foil and then also sprayed the foil liner; on the foil, I left little tabs with which I could lift all up/out for cutting on a cutting board when done/cooled-- see photo below.  I think you could use parchment paper to serve as the 'lifter', too.)
  3. In large bowl, stir above cookie base ingredients until soft dough forms.  
  4. Using a spoon, drop the dough all over the prepared baking dish, then spread it out evenly and press lightly. 
  5. Bake for about 13-15 minutes or until light golden brown. 
  6. Cool completely, about 30-40 minutes.
Ingredients for the Filling Layer:
  • 1/3 cup light corn syrup (I used Karo, the kind that doesn't have high fructose corn syrup in it.)
  • 3 tablespoons butter, softened
  • 3 tablespoons peanut butter
  • 1 tablespoon plus 1 and 1/2 teaspoons water
  • 1 and 1/4 teaspoons vanilla
  • Dash salt
      • 3 cups sifted powdered sugar (Original recipe calls for 3 and 1/2 cups.)
  1. In large bowl, beat all filling ingredients EXCEPT POWDERED SUGAR with electric mixer on medium speed until creamy and smooth. 
  2. Gradually beat in sifted powdered sugar until well blended (filling will be thick).
  3.   Drop this by spoonsful all over the baked layer, then carefully spread it out evenly. 
  4. Refrigerate while preparing the next (caramel/peanut) layer.
Ingredients for Caramel Layer:
  • 1 bag (14 oz. caramels, unwrapped (I. hate. unwrapping. caramels!)
  • 2 tablespoons water
  • 1 and 1/2 cups unsalted dry-roasted peanuts (I used lightly salted Virginia peanuts)
  1. In 2-quart saucepan, heat caramels with 2 tablespoons water over low heat, stirring constantly, until caramels are melted and creamy smooth. 
  2. Add peanuts.  Stir over the low heat for just a very little while longer since the addition of the peanuts may have cooled the caramel too much to spread easily.  When everything is evenly hot, spread this caramel/peanut mixture evenly over 'filling' layer. 
  3. Refrigerate for about 30 minutes, or until caramel layer is quite firm.
Ingredient for Topping:
  • 1 bag (about 2 cups) milk chocolate chips
  1. In small microwavable bowl, microwave chocolate chips uncovered on High for one minute, stir; microwave for one more minute, stir. 
  2. Then, when totally melted and smooth, spread evenly over cooled and firm caramel/peanut layer.  (A few minutes after putting the topping on, I used the tip of a skewer stick to make swirls in it.)  
Refrigerate for 2-3 hours or until chocolate is set.
  
IF you used aluminum or parchment paper to line the pan before baking the base (as shown below), lift out... 
It is so, SO easy to cut them into neat-edged squares after lifting them out of the pan/dish...
 (Because they are 'sweet', it's probably best to keep pieces a bit on the small size.)  Store covered at room temperature, or wrap/freeze.

Enjoy!

Saturday, December 17, 2011

Caramel Popcorn Balls (two recipes)

I never thought I say I'd like a popcorn ball recipe that was different from the one I already had/liked, but... I'm saying it now!  I'll include my 'other (first) favorite' recipe at the bottom of this posting.

Leading up to my switcheroo on recipes, why wouldn't a 'marked up' recipe in an old recipe book get my attention!?!?  Check this out...

A bit about how this happened:  Just today, my sister, Nadine, gave me some old cookbooks and I've been having a good time looking through them.  Here is a photo of this particular recipe book's cover:
It's dated 1954 (I was just a kid back then!) and is from when these church members were meeting in the beautiful white country church that still stands on Highway 29--now, a Baptist Church.  Yes, this one...

Getting back to the easy recipe on page 35, here goes...

INGREDIENTS:

(Below, I've doubled the recipe that's in the book.)

Pop enough popcorn to have 2 gallons of popped corn set aside.  Also have handy, a large bowl or kettle.  (From when we had our own 'fresh cow milk', I have gallon-sized Rubbermaid containers that I use for measuring the popped corn.)  P.S.  We very much MISS having our own cows' good RAW MILK to drink!)

More INGREDIENTS:

1 cup (2 sticks) butter
2 cups light brown sugar, packed
32 large marshmallows (I weighed the Jet Puffed kind I used, and this amount comes so close to being 4 oz.-- so,...that much in mini-marshmallows should work just fine.)
DIRECTIONS:

In a medium/large kettle, combine first the butter and brown sugar-- constantly stir this over moderately low heat with a spatula until you can feel the 'grainy' of the sugar pretty much gone.  Dump the marshmallows in and continue stirring over heat until marshmallows are melted.

    As soon as the marshmallows are totally melted and completely blended in, it is READY! 
 To make it easier to coat all the corn, I dump only one gallon popped corn in the big kettle, pour mixture over, dump the other gallon of popped corn on top of that, and quickly coat top of all with remaining mixture.  Immediately, gently stir until all is coated. 
 Now, shape into balls with buttered hands.  And,... as if one wouldn't know, huh,....BE CAREFUL because the mixture will still be hot. 

These ten balls are a large 4" across.  I know that's a LARGE ball, but....... it certainly isn't difficult to 'hack one in half' and share it.

A popcorn ball recipe could hardly be any simpler.  Here they are, wrapped and.................. so good.
Over a year ago, I bought 'online' popcorn sold through the Boy Scouts to help grandson Sam with his fundraiser.  Their popcorn is quite expensive, but it is SO good-- the 'gourmet' corn pops almost twice as large and fluffy as some other kinds and there are so few 'old maids' after popping.  I LIKE!!!

XXXXXXXXXXXXXXXXXXXXXXXXXXXXXXXXXXXXXX

BELOW is the recipe for my former 'favorite' popcorn ball-- this recipe makes a lot, too, but it's more time consuming and it does have more of butter/sugar-- but, then, there are the marshmallows in the top recipe.  Which is more 'damaging'?   Probably both... but, is one less than the other?  Decide for yourself.
First, pop enough corn so that you have 32 cups (2-gallons) of popped corn set aside and 'waiting' in a very large bowl/kettle.
~~~~~~~~~~~~~
INGREDIENTS to make the caramel coating:

1 and ½ cups granulated sugar
1 and ½ cups brown sugar (packed)
1 cup light corn syrup
1 cup water
2 teaspoons white vinegar
½ teaspoon salt
~~~~
1 and ½ cups butter 

DIRECTIONS for the cooking part:

Combine sugars, corn syrup, water, vinegar and salt in 4-quart saucepan.  Heat to boiling over medium heat, stirring.  Cook, stirring constantly, until temp. reaches 260-degrees on a candy thermometer (or, until small amount of mixture dropped into very cold water forms a hard ball). 

Remove from heat, add all of the butter and stir until it is melted and totally blended in. 

 Pour syrup in thin stream over corn in large bowl, stirring gently until all corn is well coated.  This is where a helper comes in handy--someone to stir while you pour, or the other way around.   Cool slightly.

Be careful as this is still a very HOT mixture and can (will!) burn your hands.  Make sure no young children are within reaching distance.  Butter hands, shape mixture into balls and place on waxed paper. 

Wednesday, November 30, 2011

Pine Bark Candy *

The toffee taste of this reminds me a 
little bit of a Heath® or Skor® candy bar.

It's almost a shame that something this tasty could come from  just 5 very common ingredients 'rubbing shoulders' in my 'lab'-- the end result is a tasty goodie that doesn't require a lot of fancy ingredients.  What is required?  After completed, ...plenty of willpower!

Ingredients:
  • 35 squares of saltine crackers
  • 1 cup butter 
  • 1 cup packed light brown sugar
  • 1 teaspoon vanilla extract
  • 1 of 12 oz.package milk chocolate chips

Directions:

1. Preheat oven to 400 degrees F.


2. Line a 15 by 10 by 1-inch jelly roll pan with aluminum foil.

3.  Very lightly spray foil with a non-stick cooking spray.


4.  Place saltine crackers, row by row, salty side up, in prepared pan.

5.  In a saucepan, boil butter and sugar for 3 minutes (set a timer for 3 minutes after mixture reaches a full boil).  You may reduce the heat just enough so that the mixture does not boil over the saucepan, stirring constantly.

6.  Remove from heat and stir in the vanilla extract.  Mix well.

7.  Immediately and very carefully pour hot mixture evenly over crackers (with back of spoon, spread it evenly over crackers if necessary).

8.  Bake at 400 degrees for 3 and 1/2 minutes.

9.  Remove from oven, sprinkle with chocolate chips, and spread evenly with the back of a spoon when the chocolate chips are soft enough to spread. At this point, you can sprinkle crushed pecans on top.  (Pecans are not really needed, plus they are so expensive right now.  Instead, you could make this candy look a bit more 'festive' by adding your favorite kind of 'cookie sprinkles'.)

10.  Put the whole pan into the refrigerator for 3-4 hours, or into an unheated area until everything's cold/hard.

11.  Cut OR break into irregular shapes/pieces and store in a covered container (or Zip Lock bag) in the refrigerator or other unheated area.

12.  DELICIOUS!  (And, a bit 'addicting' if you like these flavors!)

 Here,... try a piece!
*The basic recipe came from:  http://www.foodnetwork.com/recipes/paula-deen/pine-bark-recipe/index.html

Another recipe for this is listed at:  http://krty.com/pages/2706688.php 

OR,...one more cook's way of making this is at:  http://www.mommyskitchen.net/2010/12/saltine-toffee-candy-aka-christmas.html , 

OR,... check out this cook's suggestion about heating the 'caramel layer' to a certain degree (a slower method) to end up with harder toffee-like caramel layer at http://www.feelslikehomeblog.com/2009/12/christmas-crack-also-known-as-cracker-candy-or-toffee-bark/

Tuesday, November 29, 2011

Imitation Mint "Cookies"

These remind me of those good minty cookies sold by young girls each year.  IF you like minty things, you will like this good and simple-to-fix treat!   For me, these are as good as CANDY (I've included these in the 'candy' category, as well.)


When it comes to dipping the crackers into the chocolate, I use my little pinchy metal kind of tongs-- I just have to not 'grab them too tightly' or I'll break the edge off the cracker. 

Ingredients

  • 1 of 10 oz. bag of Andes Creme De Menthe Baking Chips*
  • 1 tube of Ritz crackers

Directions

  1. Melt the baking chips in the microwave, stirring at minute intervals until melted and smooth.  (Watch carefully.)
  2. Line a cookie sheet with foil (or waxed paper, or Saran Wrap).
~~~~~~~~~~~~~~~~~~~~~~
Dip Crackers into melted minty chocolate chips until they are covered, let drip for a few seconds, wipe extra off bottom side on bowl edge, and put on lined cookie sheet, making sure they do not touch.  If you are particular about 'presentation', you can take a sharp knife and trim excess chocolate from around the edges after they cool.

*In the past, I've melted the same amount of Ghirardelli semi-sweet chocolate chips to which I added a few squares of the Andes Mint candy pieces and that works, too.  

Kids LIKE sprinkles and these can be added right after the cracker is dipped...


Chill until firm. 

Saturday, November 19, 2011

Pretzel Kiss Treats


Place little pretzel squares on an aluminum lined baking sheet, sit an unwrapped Hershey's Kiss* on the center of each.  Place into a PRE-heated 170-degree oven for almost 10 minutes, or until each kiss is soft enough for an M&M to be pressed into the top of each.  Let cool in refrigerator until set up/hardened.  Enjoy this small salty/sweet treat.

* I think it would be more economical to drizzle melted dipping chocolate (milk chocolate flavor) over the top of the pretzels-- or two separate drizzles of chocolate AND white chocolate over each.  Let your imagination rule!