Milkmaid's Recipe Box

FOOD, FOOD, FOOD! I'm such a FARMER at heart-- even a CALF knows that so much in life is about the FOOD! (A bit of a "bio" about me can be found way down near the bottom.)

You can find a recipe index entitled "Labels" down along the right side, starting below the picture of the farm. Then, below the "Label" list are pictures of some of my old "standbys"-- click on their picture and it should take you to the recipe.

You will see no advertising on my blog; this means there is no monetary benefit for me having "visitors" or "joiners"-- having said that, if you do wish to JOIN my blog, you can do so by scrolling w-a-y down to near the bottom of the page...

My Visitors

Locations of Site Visitors
Showing posts with label Meat. Show all posts

Monday, October 1, 2012

Beef Roast w/Vegetables

We are nine days into Autumn!  
I knew I wanted to go walking in our beautiful 
woods today, hoping I would NOT 
see any wolves or bears!   Anyhow, ...
before leaving the house, I 
combined some goodies for our 
supper ("dinner" to city folks!) and 
let the oven do the rest.  The meal I 
put together happened to be color coordinated 
with the beauty I saw on my walk (see below).

My Lazy Easy Day Meal!

INGREDIENTS:


  • 1 (3-5 lb.) beef roast-- you can use a pork roast if you prefer.  If you can't afford a 'large' roast, use a little one-- that will work, too.
  • 1 tablespoon olive oil.
  • 2 teaspoons garlic salt.
  • Freshly cracked black pepper, to taste.
  • 1 can (15 oz.?) vegetable OR beef stock.
  • 6 large carrots, cut into chunks (3 carrots, if making smaller quantity in slow cooker).
  • 1 large onion, cut into whatever size pieces you like.
  • 6 large stalks of celery, cut into 1" pieces (3 stalks, if making smaller quantity in slow cooker).
  • 3 lb. bag of small red potatoes, scrubbed and cut into halves (OR as few as 8  potatoes if using a slow cooker for smaller quantity.)
  • 2 cans of 10.75 oz. cream of mushroom soup (I like the 99% fat free variety).
  • 1/2 teaspoon dried thyme.
  • 1/2 teaspoon dried sage.
DIRECTIONS:
  • Spray 6 quart enameled cast iron dutch oven OR slow cooker container with non-stick spray.
  • Prepare carrots, onion, celery, potatoes and put them in the bottom.
  • Pour the vegetable OR beef stock over the layer of vegetables.

  • Drizzle olive oil on both sides of the roast and season it well with the garlic salt and ground pepper (rub it in). 
  • Lay the roast on top of the mixed vegetable layer.  (The side of the roast with the most fat on it should be on top-- upwards. I  k-n-o-w,... it's said that FAT gives flavor, but I just cannot resist trimming excess fat off-- now, I didn't say "ALL", I only said "...excess"!) 


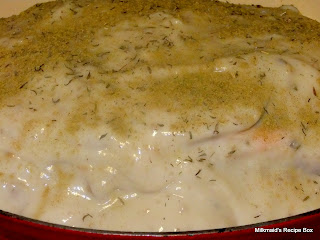
  • Smear the cream of mushroom on top of the roast and then sprinkle that with the thyme and sage. 

  • Cover and cook for about 5-6 hours in oven at 295-degrees, OR for about 8 - 10 hours in slow cooker on LOW.  (As I checked on its 'progress' after a few hours, I ladled some of the sauce over the top of the roast.)


I think you will like how this makes your home smell.

I think you will like how easy it was to make.

I think you will like how moist the meat is.

I think you will like it, period!

Here,... try it!

Below:  A week or so ago, Bruce came over 
with AMBITION, lawn equipment and more!  
Before long, the yard around the cabin 
was freed of brush, and the VERY overgrown 
grass was cut (for the first time in a 
couple of years, I might add!).   Today, when I went 
'back there', ...everything looked 
SO-O-O-O pretty!

Friday, June 8, 2012

Batter-Fried Fish Fillets (OR Chicken Tenders/Fillets)

Because I don't believe that 'deep frying' food is all that 'healthy', I don't use this recipe much more than ONCE a year.   (Besides, since you'll need pretty much a whole quart of oil, it can be expensive  to 'deep fry' things on a regular basis.)   

Having said that,... this recipe is...

Great for having your own special part  
of a Fish Fry Friday...
Above:  They were NOT as 'oily' as they might look in this picture.  Most of what you see that LOOKS like 'oily' was the reflection of light coming through the window.  These fish fillets were very CRUNCHY and DELICIOUS!
---------------------------
Below: Deep-Fried Fish and a really quick-to-make 
Tartar Sauce-like sauce...
Above:  For my own kind of Tartar Sauce-like sauce, I just stir some of my own homemade pickle relish into either Hellman's mayonnaise OR Miracle Whip Salad Dressing.  The taste will be altered by the variety of relish you mix into either the mayonnaise OR Miracle Whip.

For quite a while, I've had this recipe for a 'frying batter' and we like it because it doesn't get soggy/heavy as it fries.   (I'm thinking this is the same recipe my mother used in the 'olden days'.) 

INGREDIENTS:
  • 3/4 cup flour
  • 2  level tablespoons cornstarch
  • 1/4 teaspoon baking soda
  • 1/4 teaspoon baking powder
  • 1/2 teaspoon salt
  • 3/4 cup cold water
Also, I suggest you google for yourself the information on when/how/IF already-used oil (after carefully straining it) could/should be saved for another use at https://www.google.com/webhp?sourceid=chrome-instant&ie=UTF-8&ion=1#hl=en&output=search&sclient=psy-ab&q=Can%20I%20re-use%20deep%20frying%20oil&oq=&aq=&aqi=&aql=&gs_l=&pbx=1&fp=669bb0f587f6dede&ion=1&bav=on.2,or.r_gc.r_pw.r_qf.,cf.osb&biw=1163&bih=590

 DIRECTIONS*:

1. Sift dry ingredients together
2.  Add water and mix very well (until smooth)
3.  Use to coat fish or chicken fillets.
4.  Cover both sides completely, letting excess drip off.
5.  Deep fry in oil at 360-370 degrees until a nice golden brown.**
6.  After DEEP FRYING for about 5 minutes, remove from oil and place on an absorbent surface.  (If frying in a pan, continue until each side is golden brown and the center is done.)

*My personal opinion is that this batter is even better if made about an hour ahead of using it.

**Some use this batter (as listed above) and then fry the fish in a regular frying pan. In that case, your fried fish might look like this: 
Above:  For frying in a pan, I use a little oil and then, without having the heat too high, I add a very small amount of butter to aid with the 'browning'.

** ANOTHER WAY I LIKE TO FRY FISH:  Dip each side of a fish fillet into some dry buttermilk pancake mix, and then fry in a light mix of oil/butter.  That's a "YUM", too!!!


P.S.  Thank you, Fisherman Jim (and Pam), for the fish.  The 'fish of your labors' couldn't have been better!

Wednesday, February 8, 2012

Oven-Finished Chicken (lower fat version)

I make up the coating mix, put it in a jar with the recipe taped to its outside, like this... 

COATING MIX RECIPE FOR CHICKEN
  • 2 cups flour
  • 2 tablespoons salt ('low-sodium people' can/will adjust/adapt this, I'm sure)
  • 2 tablespoons pepper
  • 1 tablespoon dried thyme
  • 1 tablespoon dried tarragon
  • 1 tablespoon ground ginger
  • 1 tablespoon ground mustard
  • 1 teaspoon garlic salt
  • 1 teaspoon dried oregano
Yield:  2 ½ cups coating mix (enough for about 3 batches, 4-6 servings per batch).
OTHER INGREDIENTS: 
1 egg
¼  cup milk
1 broiler (2 ½ to 3 ½ pounds) cut up, remove skin and trim fat.
Oil for frying

DIRECTIONS:
  • Combine the first nine dry ingredients and mix together very well; store in an air-tight container.
  • In a small bowl, beat together the egg and milk. 
  • Place just ¾ cup of the dry seasoned coating mix in another small bowl. 
  • Remove skin from chicken  and trim visible fat (I used kitchen shears for this.)  In the next photo, I show that I trimmed off one heaping measuring cup of skin and visible fat from just eight thigh pieces of chicken.  I've blurred the photo on purpose because there's nothing 'attractive' about this-- not in the cup, not anywhere! 
  • Blot chicken dry with paper towel, dip it into the egg mixture and let excess drip off; roll in coating mix to cover.
  • Heat ¼ in. of oil in a skillet over medium-high heat.  Brown chicken on all sides.
  • Transfer to a foil-lined and lightly sprayed 15x10x1-in. baking pan.
  • Bake, uncovered at 350 degrees for 45-55 minutes or until juices run clear.


 Here, try a piece!  My opinion:  I don't even miss the 'missing skin/fat' because the coating does a great job of adding a delicious and browned covering.


I adapted this recipe from one I saw in a Contest Winning Recipes book from Taste of Home.  I think it was in the 2004 edition, and my recipe card says it was a recipe from Dawn Supina, Edmonton, Alberta.   Changes I made:  I cut egg/milk mix in half and I removed the skin/visible fat from the chicken.

Monday, August 22, 2011

Pork Chops w/Mushroom Soup (quick 'n easy)

                                                                                                            Photo by Doris


Photo by Doris


Ingredients:

1. Pork Chops
2. Cream of Mushroom Soup, diluted and mixed well with 1/2 its amount in milk.

...........................................................

I like to use the low-fat version of Cream of Mushroom soup.  (With just a few chops, I use the 10.5 oz. can; with a lot of chops, I use two cans OR the 26 oz. can)

Take however many pork chops you want and coat each side with a mixture of flour/salt/pepper (not too much salt, because the mushroom soup will be plenty salty).

Fry each just long enough to brown both sides to a golden brown and remove from pan.  Set aside.  (In the past, I once made these without browning them at all, and nobody complained!)

Spray whatever baking dish you choose with Pam (non-stick spray).  Put down a thin layer of the above combination Cream of Mushroom soup/milk mixture.
Layer the pork chops in the casserole dish.  If you have a lot, you can lay them at an angle with each resting a bit on the other.  If you have less, you can lay them out singly.  If you have them touching each other, lift each slightly as you pour remaining soup over them so that it gets between them.  If they are single layered, just pour the soup over the tops of them.

Cover tightly with foil and bake until done.  My favorite way is to prepare them as above and then bake them in a slow oven (300-degrees) for  2 hours or even more. 

TIP:  The pork chops that are boneless and SO lean that they are beautiful don't end up quite as 'fall apart' good as when using porchops with the bone and a little fat in them.