Milkmaid's Recipe Box

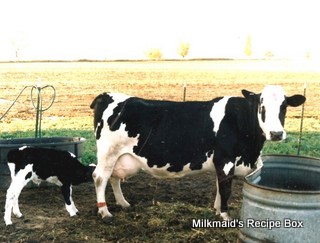
FOOD, FOOD, FOOD! I'm such a FARMER at heart-- even a CALF knows that so much in life is about the FOOD! (A bit of a "bio" about me can be found way down near the bottom.)

You can find a recipe index entitled "Labels" down along the right side, starting below the picture of the farm. Then, below the "Label" list are pictures of some of my old "standbys"-- click on their picture and it should take you to the recipe.

You will see no advertising on my blog; this means there is no monetary benefit for me having "visitors" or "joiners"-- having said that, if you do wish to JOIN my blog, you can do so by scrolling w-a-y down to near the bottom of the page...

My Visitors

Locations of Site Visitors

Saturday, April 6, 2013

Jell-O with Cool Whip


Looks like more work than it is-- 
in fact it ISN'T work at all!
I don't use Cool Whip® too often, but... 
every now and then,...  I do.

Ingredients:
  • ONE of the 6 oz. size (8 servings) boxes of Jell-O
    ®
     of your choice.
  • 3 cups boiling water.
  • ONE of 8 oz. container Cool Whip
    ®
    , thawed.*
Directions:
  • Dissolve the Jell-O 
    powder in the 3 cups boiling water.  Stir for at least two full minutes to make sure every grain of sugar is dissolved.
  • Stir in the thawed Cool Whip  (stir until it is thoroughly dissolved and mixed in).
  • Pour into serving cups/dishes.  Refrigerate for a minimum of four hours.  On its own, the Jell-O 
    mixture separates into what looks like two layers.
  • Because I planned to leave these in the refrigerator overnight, I covered each with a piece of Saran Wrap after a couple of hours.   If I would have covered them while still warm, I'm sure a lot of condensation (water droplets) would have formed and I didn't want that to happen.


 *  If you haven't let the Cool Whip® thaw ahead of time, you can put it in right from the freezer-- you'll just have to stir it longer while/until it totally dissolves.

This time I used STRAWBERRY 
flavored Jell-O®.   Next time, maybe 
on a HOT Summer day, I will 
use LEMON Jell-O®... and I 
will like that, too!

Friday, April 5, 2013

Cereal Flake "Hello" Cookies

                                                 (Photo by me, Doris)

Good taste, with a bit of crunchy goodness as a bonus!
The cookies in the picture were rolled in corn flake crumbs.


I made these cookies a lot during the time we lived on the 'chicken' farm and they were a favorite then, and still are.  This recipe makes a rather small batch, so I almost always doubled it.

MIX:
1/3 cup butter, softened 
½ cup granulated sugar
1  large egg

STIR IN:
1 tablespoon milk
1 tsp. vanilla

MEASURE, BLEND, and STIR IN:
1 and 1/2 cup flour
¼ tsp. baking soda
1/2 tsp. baking powder
¼ tsp. salt

STIR IN:
½ cup raisins OR chopped dates, OR craisins, OR dried cherries
½ c. nuts, chopped coarsely

Drop Walnut-sized dough ball into:
1 and ½ cups finely crushed crunchy kind of cereal crushed.  I've used bran flakes, cornflakes, etc. 

Coat cookie balls with these crumbs.
~~~~~~~~~~~~~~~~~~~~~~

Place 2” apart on greased (or parchment paper-lined) baking sheet/.  Press ½ of a maraschino cherry into center of each ball of dough and bake for 12-13 minutes in a 375-degree oven.  Bake only until cookie is set and lightly browned-- it will finish baking as it sits on the hot baking sheet until cooled.

                                                                                                                                    (Photo by me, Doris)

CREAMY TUNA NOODLE CASSEROLE

And,...it IS CREAMY!


If you google Creamy Tuna Noodle Casserole, you'll come up with over 500,000 websites.  Certainly, I haven't checked very many of them out.  Even if I don't remember exactly where I got the basics of this recipe from,... we do like it.

INGREDIENTS:

  • 6 cups (about 8 oz.) DRY medium egg noodles, PREPARED ACCORDING TO PACKAGE DIRECTIONS.  (Macaroni noodles work for this, too.)
  • 6 tablespoons butter
  • 6 stalks celery, finely chopped
  • 1 cup onion, chopped
  • 2 cans (5 oz. each) tuna, drained and flaked (I think MORE tuna would work, too.)
  • 2 cans (10 oz. each) condensed cream of mushroom soup (I like the low-fat kind)
  • 1 can (12 oz.) evaporated milk.
  • 2 cups grated cheddar cheese of your choice
  • 1 cup of  green beans OR frozen peas (Optional).  When adding peas, I prefer frozen peas because they keep their color and shape better than canned peas.
  • 2/3 cup crushed potato chips (Optional).  I did not use them.
DIRECTIONS:

  1. Boil the egg noodles (or macaroni noodles) according to directions on the package.
  2. While the noodles are boiling, do the following...
  3. Preheat oven to 375 degrees.  Grease or spray a 9x13" baking dish (I used a glass dish)
  4. Melt butter in large saucepan over medium heat.  Add celery and onion; cook, stirring occasionally for about 5 minutes or until vegetables are tender.   Stir in drained noodles, flaked tuna, soup, evaporated milk and grated cheese.  Mix well.
  5. Pour into prepared casserole dish.  Sprinkle with potato chips (optional).
  6. Bake for 30-35 minutes or until top is only lightly browned (or until the "optional" potato chips topping is lightly browned).  
  7. IF you do not add potato chips to the top, you can sprinkle a little cheese on top for the last five minutes of baking time.
What I like to do with this casserole:  Once it's cooled and 'firms up', I like to cut it into about 4 x 4" squares.  Freeze the individual squares overnight.  Next day, I vacuum seal the frozen squares for 'grab a meal' when I need it.   TASTES SO GOOD-- even after freezing.

Wednesday, April 3, 2013

VENISON (for various dishes)

  
This is mainly what we do with VENISON.  No matter WHAT kind of cut it is, it always ends up being tender.

Because the WHITETAIL deer around here feast on our rich alfalfa fields and also steal all the corn they could possibly want from our cornfields, there is very little (if any) "wild taste" to their meat.  If the deer in your area feast on things that contribute to a 'stronger/wild' taste, ... can you just add more onions (or ??) to balance that out?    IF you do not like 'wild', that is?

First, ...when cutting up our VENISON, we don't set any aside for grinding into 'hamburger', nor for making sausage (I DO like venison sausage, but, in spite of that, I prefer to avoid some of the 'meat treatments' that are added while making it-- and, besides that, making VENISON sausage can be very costly unless you do it on your own). 

For us, it does not matter WHICH CUT of VENISON I 'chunk up' (I even use the 'tougher' parts') because I've found that slow (low and long) cooking takes care of ANY toughness.  And,...WOW!,... does THIS make a home smell G-O-O-O-O-O-O-O-O-O-D!!!!!!

Again,...I cut/leave the meat in rather large chunks (2 pounds each?) before putting it into freezer bags and freezing.   By doing this, I don't deal with a freezer container of smaller pieces that are more easily 'freezer burned', etc.   Using a vacuum sealer works even BETTER to keep the VENISON very fresh-like!

By cutting/freezing the meat into large chunks, it makes 'putting a deer away' go very quickly!
  
When planning to make STEW, or STROGANOFF, or ???,  I take a 'chunk' from the freezer and let it defrost.   Next, I cut the meat into very little strips, or little cubes, depending on what I want to make with it.  (IF you start cutting it up when it's still a LITTLE frozen/frosty, you can even MORE easily slice/dice it into SMALL pieces.)

DIRECTIONS:

  • Brown the small pieces of meat in a large pan with olive oil.
  • Right away, at the start of browning the meat, add a whole onion (sliced), as many carrots (chunked) as you like, and a cup of chopped celery.  (Actually, add whatever vegetables and how much of the them YOU like!)
  • Season with salt, pepper as you prefer.  You can add garlic and continue on for just a few minutes (do NOT allow garlic to burn!).
  • When the meat is browned, move this combined mixture to a heavy dutch oven OR a slow-cooker (crock pot?).
  • Pour two of 10 oz. cans of Cream of Mushroom soup (or one large) over the top.  
  • Add three soup cans of water (I dump the water down along the edge so as not to disturb the thick soup layer on top).  Cover tightly.
  • Get cooking!  When I use a slow-cooker (or crock pot), I start it on HIGH for about two hours and then turn to LOW for a few hours.  In the oven, I start it out at 300-degrees for about an hour and then turn it down to 250 for a few hours.  Testing for 'meat tenderness' is your best guide for deciding how long you continue.
  • Serve OVER mashed potatoes, WITH baked potatoes, OVER biscuits, or OVER noodles.  (OR, ...about two hours before the end of your cooking time, add chunks of raw potatoes to the meat mixture in the cooking container and continue on.)