Milkmaid's Recipe Box

FOOD, FOOD, FOOD! I'm such a FARMER at heart-- even a CALF knows that so much in life is about the FOOD! (A bit of a "bio" about me can be found way down near the bottom.)

You can find a recipe index entitled "Labels" down along the right side, starting below the picture of the farm. Then, below the "Label" list are pictures of some of my old "standbys"-- click on their picture and it should take you to the recipe.

You will see no advertising on my blog; this means there is no monetary benefit for me having "visitors" or "joiners"-- having said that, if you do wish to JOIN my blog, you can do so by scrolling w-a-y down to near the bottom of the page...

My Visitors

Locations of Site Visitors

Sunday, January 29, 2012

Fruit Trifle (with variation)

Since a number of friends were wondering about the 'creamy layers' in the trifle I took to today's 'pot luck doings', I'm moving this recipe to the top of the list in my 'DESSERT' section here in my recipe blog to make it easier to find. 
                                             (Photo by me, Doris)
Use whatever fruit you like-- or a combination of fruits that go together well.


Today, with the big bowl I used, I doubled this recipe.  And,... yesterday, I made my own pound cake for this since a small 10.75 ounce rectangle of frozen Sara Lee pound cake sells for about $3.99 and I think that's quite a large amount of moolah for so little.  With the recipe I use for making my own pound cake, I end up with more than 3# of cake and save a good amount of $$$.   You can find the pound cake recipe I used right below this posting-- it can also be found in the "CAKE" category.


Another 'variation' of  the recipe looks like this:
For the 'variation' above, I cut a layer of 'chocolate w/coconut' cake (your favorite brownies would work for this, too) into neat little squares and layered them with a mixture of cream cheese/instant vanilla pudding/whipped topping.  This could also be made using chocolate instant pudding but I thought that might be 'too much' of a good thing (IF that is possible).                                    
  ............................................................

Total time to prepare:  20 minutes
Makes:  12-14 servings of 2/3 cup each

Read through the recipe before you start.

WHAT YOU NEED to make the fruit trifle:
  • 3 cups sliced fresh strawberries (save a couple of whole berries for top)
  • 3 tablespoons sugar
~~~~~and~~~~~
  • 2 pkg. (8 oz. each) softened cream cheese
  • 1 and 1/2 cups cold milk,  added to the instant pudding powder
  • 1 small-sized box (3.4 ounce) Jell-O Vanilla Instant Pudding
  • 1/2 pint whipping cream (whipped up), OR 2 cups thawed Cool Whip, divided.
  • 4 cups pound cake cut into 1/2" cubes (If you've made pound cake ahead of time for occasions like this, you can leave it frozen right up until cubing it.) 

DIRECTIONS:
  • Sprinkle the sugar over the sliced strawberries.  Refrigerate until ready to use.  (I sometimes do this an hour or so ahead of time.)
  • Beat the cream cheese until softened and creamy smooth.* 
  • Slowly, add pudding mix with the 1 and 1/2 cups of milk, mix well.
  • Blend in 1 and 1/2 cups whipped cream OR 2 cups thawed Cool Whip.
  • Put about 1" of the cream cheese/pudding/whipped topping mix in bottom of bowl.
  • Top with cake cubes, berries and more of the cream cheese mixture.
  • Repeat the layering, if you have enough left to do so.
  • Cover top with remaining whipped cream or Cool Whip topping.
  • Refrigerate for 4 hours.
  • Very lightly drizzle a few small streams of Hershey chocolate syrup over top, optional.
  • Garnish with a couple of strawberries or whatever fruit you are using, optional.
*I have a Cuisinart food processor, so I can put  UNsoftened cream cheese in it first, add the milk, then the pudding-- it sure is a quick way to get those three combined.

Another tip:  Instead of making just these few 'layers', you can have thinner layers-- and more of them.  This dessert could also be made in a glass 9x13-inch dish and be pretty, too.

I think I found this recipe in some literature from Kraft Foods, but I don't know which/where.

Pound Cake

This cake-- all because I want to make a fruit trifle and,... 
I wanted a pound cake for 'layering' it. 

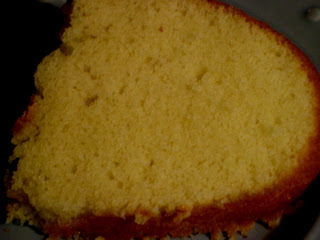
A Sara Lee pound cake from the grocer's freezer section tastes really good but a 'small' 10.75 oz. rectangle of it was already selling for $3.99 a few years ago, and I think that's a lot of moolah for so little. The recipe below yielded just over 3 lbs.  I don't have to use my head or a calculator to know.................YIPPEE SKIPPEE, I saved plenty by making my own!
This is going to 'slice/cube' just fine...
It's gonna do da job!

INGREDIENTS:
  • 3 sticks butter, plus more for the pan.
  • 3 cups sugar
  • 5 large eggs
  • 3 cups all-purpose flour, plus a bit more for the pan.
  • 1/2 teaspoon fine salt
  • 1/2 teaspoon baking powder
  • 1 cup mik (not less than 2% fat works best)
  • 2 teaspoons high quality vanilla extract
DIRECTIONS:
  • Preheat oven to 350-degrees F.
  • Grease and flour a tube pan (you could use two of the 9x5 inch loaf pans, buttered and floured)
  • With a mixer, cream butter and sugar together for about 4 minutes.
  • Add eggs, one at a time, beating after each additon.
  • Stir dry ingredients together in a bowl and add to mixer alternately with milk, starting with the flour and ending with the flour.
  • Mix in vanilla.
  • Pour into prepared tube pan, or two loaf pans.
  • Bake for 1 to 1½ hours, until a toothpick inserted in the center of the cake comes out clean.  (Check after the first hour.)
  • After letting it cool in pan for about 15 minutes, loosen edges, invert on plate.

Friday, January 27, 2012

Cabbage Soup

What!?  Onions, apples, potatoes, garlic and cabbage together in one soup?  Oh,........yeah!
Granddaughter Megan is quite the little bread baker-- just yesterday, she brought us the 'braided bread' in the photo.   M-m-m-m-m-m-m.......

You are so right if you think I'm on a 'cabbage kick'!  You know how they say 'two heads are better than one'?   Well,....mine, plus a cabbage-- this works for me, and the end result is...
TA-A-A-A-STY!!

I like this cabbage soup!  PJ told me I should include a story about this recipe-- a few years back, Grandson Ben was watching as I peeled and sliced the apples and asked what I was making.  When I told him it was 'Cabbage Soup', he quickly added in a sweet but matter of fact way, "You don't have to make any of that for me."  It was funny how the 'apple' had gotten his attention, and how quickly the 'cabbage' word erased it!

As with almost all recipes, a little tweaking doesn't hurt-- but, here is the recipe for how I make it:

With the exception of the ground beef and the Italian seasoning, the following recipe is already doubled because we like it as a re-run (left-over).  You could easily use the same amount of lean ground beef and halve the rest of the ingredients for a smaller batch.

INGREDIENTS:
  • 1 pound lean hamburger, browned, drained well.
  • 3 Tablespoons vegetable oil (I used light tasting Olive Oil)
  • 2 cups very thinly sliced onions
  • 4 apples-- peeled, cored, and finely diced.
  • 6 cups shredded cabbage
  • 2 cloves garlic, minced (or powder, to equal that)
  • 2 large raw potatoes, shredded
  • 6 cups vegetable broth (I used a large 46-oz. can of V-8 juice, but you could use your own homemade recipe of tomato 'cocktail'.)
  • 2 teaspoons Italian seasoning (rub together between fingers, to release more flavor)
  • 2 teaspoons white sugar
  • 1 cup half-and-half or cream 
  • salt and pepper to taste
- - - - - - - - - - - - - - - - - - - - - -

DIRECTIONS:
  • Brown hamburger, drain.  Set aside.
  • In a large heavy pot, cook onion and apple in oil over medium-high heat until just lightly browned. 
  • Stir in cabbage and garlic, then reduce heat.  Stir in browned hamburger,  grated potato, broth (or juice), Italian seasoning,  sugar, salt and pepper; cover and simmer 30 minutes* (see my * note below). 
  • Once everything is added, it looks like this.... now, it's ready to 'do its thing'.

Stir in cream.  Heat through and serve. (Adding the cream gives its V-8 soup base a lighter color at the end.)
- - - - - - - - - - - - - - - - - - - - - - -
*Like I often do with other recipes like this, rather than watch it on top of the stove, I prefer to put my covered enameled cast iron Dutch oven of soup into the oven at 300-degrees for a '...see ya in an hour' kind of ease.  Slow-cooking crock pots work for this, also, and will give you an even longer time to be 'away' while 'the goodness is happening'!

xxxxxxxxxxxxxxxxxxxxxxxxxxxxxxxxxxxxxxxxxx

I found this recipe quite a few years ago in a magazine and saw that a similar one was on allrecipes.com.  One submitter wrote:  "I love cabbage and always try to come up with new ideas for cooking with it; it's a very economical staple in the fall and winter months, thus this recipe.  Add any vegetables or meats that you like--this is a recipe of great versatility! ...Enjoy!" 

The 'readers comments' section wasn't so favorable for this recipe.  It seemed there were a lot of complainers/whiners who left comments-- the recipe wasn't this,... it wasn't that,... nobody liked it, etc.  

Well,............I (we) DO like this recipe and I would give it 5 stars-- maybe it is the 'added hamburger' that contributes to our liking it so well. (?)    I can also see adding a very lean version of sausage (Kielbasa type?) to this recipe in place of the hamburger.  I, too,  think this is a recipe you can work up to suit yourself and your family.

Cabbage Patch Stew


This might look like chili, but I think it's the cabbage that adds so much!
While some cooks make this on top the stove, I prefer the slow-oven method because it gives me a couple of hours before the meal to have fun doing something else. This would also be a good crock pot (slow cooker) recipe.
Honestly, I could eat this for three meals a day until it's gone... yep, that's me!!!!
If you do a recipe search for Cabbage Patch Stew, you might bring up more recipes than you'll ever be able to look through!  I don't think the ingredients have to be exact in any way-- mine sometimes vary.  This time, I made it like this:

INGREDIENTS:

1 pound lean ground beef (could use turkey, or venison if you like that)
1 tablespoon olive oil
1 large onion, thinly sliced
2 and 1/2 cups chopped cabbage (coarsely chopped)
3/4 cup chopped celery
1 16-oz. petite diced tomatoes (can use stewed tomatoes)
1 15-oz can kidney beans, UNdrained (When doubling recipe like I did today, I use one can of light red, and another of dark red to make it 'purty'-- could add black beans, too!)
1 and 1/2 cup water
1 to 1and 1/2 teaspoon salt
1/4 teaspoon pepper
1 to 2 teaspoon chili powder (For my hubby's sake, I used just one, then added more to mine later.)
Bisquick 'droppings' for at the end, very optional. (Check recipe option at the bottom of this posting.)

DIRECTIONS:
  • Cook and stir ground meat in Dutch oven until browned.  Drain. 
  • Put olive oil in bottom of Dutch oven.  To the drained meat, add onions, cabbage and celery.    
  • Cook together over medium heat for maybe five minutes, stirring, until vegetables are just a bit tender. 
  • Stir in tomatoes, kidney beans (with liquid), water, salt, pepper and chili powder
  • This is where I do things 'more differenter' than most other recipes describe.  Instead of making this on top of the stove start-to-finish and putting drops of 'dumpling dough' on the hot liquid just before serving,  I covered the Dutch oven, put it into a 300-degree oven and let it go for two hours.   When it came out of the oven, it looked like this:
  • At this point, if you wish, you can add 'droplets' of biscuit dough and put into a 350-375 oven for maybe ten minutes, or so, until the 'biscuit droplets' show a tinge of brown...
EN-JOY!


* If you don't use brand-name Bisquick, you can make you own 'biscuit droplets' or dumplings by GENTLY mixing together this combination:
3/4 cup flour
1 tsp. baking powder
1/3 tsp. salt
1 and 1/2  tbsp. shortening
Little less than 1/2 cup milk

Combine first three ingredients, cut in the shortening; add the milk and gently stir only until incorporated.   

Tuesday, January 24, 2012

Impossible (EASY!) Cheeseburger Pie

If you have some ground beef/onion browned ahead of time,....I think a very young cook could make this!
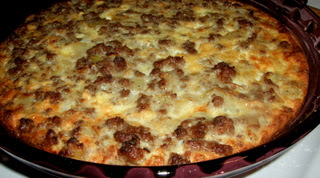
Below:  Instead of putting the 1/2 cup grated cheese IN the pie, I sprinkled white cheddar cheese (extra sharp by Cabot) on top just as soon as I removed it from the oven.  This way, if there is someone who does not want cheese on their portion, it can more easily be accomplished.
Yield:  Six 'hamburger pie' slices.
 
I've had this recipe for what seems like 'forever', and I think it came from the back of a Bisquick® mix.  In checking, I see this recipe is still 'out there' in the world of recipes.  With a tossed green salad, this makes for the start of a quickly put together meal.   I've already added canned/frozen corn to the hamburger/onion layer, and that was good, too.

If you don't have Bisquick® on hand, there are many websites with information on making up a batch of your own.  For example, take your pick:  https://www.google.com/search?q=substitute+bisquick&rls=com.microsoft:en-us:IE-SearchBox&ie=UTF-8&oe=UTF-8&sourceid=ie7&rlz=1I7GWYA

INGREDIENTS:
  • 1 lb. lean ground beef, browned and drained
  • 1 large onion (1 cup of chopped), fried with ground beef.
  • 1/2 teaspoon salt
  • 1/2 or 1 cup shredded Cheddar cheese
  • 1/2 cup Original Bisquick® mix
  • 1 cup milk
  • 2 eggs
DIRECTIONS:
  • Heat oven to 400° F.  Spray 9-inch glass pie plate with cooking spray. 
  • In 10-inch skillet, cook beef and onion over medium heat 8 to 10 minutes, stirring occasionally, until beef is browned; drain.  Stir in salt. 
  •  Spread in pie plate.   Sprinkle evenly with cheese.*
  • In small bowl, stir remaining ingredients with fork or whisk until well blended. Pour over hamburger/cheese mixture in pie plate.

  • Bake about 25 minutes, or until knife inserted in center comes out clean.
Makes 6 servings.

*Alternate way:  Instead of putting the 1/2 cup shredded Cheddar cheese over the hamburger/onion layer, I waited until it came out of the oven to put it (cheese) on top; then returned it to the oven for just a minute or two so it could melt. 

Saturday, January 21, 2012

Potato-Chicken-Broccoli Casserole

If you like the taste of having broccoli in a casserole, you'll like this.  If you don't, ... just substitute another colorful vegetable.
 
From 'farmer days' when I'd have to figure out what things I could combine, put them into the oven (or, slow cookin' crock pot) and leave the house, we often had casseroles.  After looking at any casserole recipe for a few minutes, I found there are plenty of ways to cut down the 'CREAMiness' by using lower fat ingredients.  You can do the same with the recipe in this post-- look at the ingredients list and do what you want with it. 
Recently, a lady was telling about an elderly guy describing a dish some ladies would bring to the pot luck gatherings held at their church.  He'd say something like, "I like that casserole where they leave some slices of  raw crunchy potatoes in it."   Glad you liked it, guy, but...those 'raw potatoes' just happend to be... water chestnuts!    (Cute!)

Today's casserole ended up being more of a 'Whatever's Within Reach' casserole.  It's a combination of things I wasn't so sure would go together-- hashbrown potatoes, celery, onions, broccoli, chicken, water chestnuts, sour cream, cream of chicken soup, milk, seasonings, a topping of more cheese and crushed potato chips.  My biggest 'wonder' about this was in the combination of vegetables.   It came together just fine.

When I had all the ingredients combined in a really large mixing bowl, I knew this wasn't going to fit into a 9x13 baking dish, so..................................I brought out the 'bigger one' (10x15-inch) and, as Goldilocks said about Baby Bear's porridge, "This one is JUST right!".

INGREDIENTS:

  • 2 lb. frozen hashbrown potatoes (any style), thawed in refrigerator.
  • 2-3 cups cooked chicken, cut into 1" pieces.
  • 1 cup grated mild cheddar cheese (mild cheddar is a 'gooier' kind of cheese, and makes a better 'glue')
  • 2 cups celery, finely chopped
  • 1 cup onion, chopped
  • 1 small can sliced water chestnuts (size ?-- it was a tad bit bigger than the 5 oz. cans of tuna).  These aren't necessary.  I just happen to like the extra bit of c-r-u-n-c-h they add here and there when included.
  • 2 cans (10 and 3/4 oz.) cream of chicken soup (1 of the larger 26 oz.cans is more economical and, even if that is 'more in ounces', it works just as well)
  • 1 and 1/2 cups milk
  • 1 cup sour cream (or, you could use same amount of low-fat mayonnaise)
  • 1/2 teaspoon ground black pepper
  • 1/4 - 1/2 teaspoon salt (because the potatoes aren't salted) 
  • 2 medium heads broccoli (separated into smaller florets and pre-steamed for about 5 minutes)
  • 1/2 cup grated cheddar cheese (medium or sharp works well)
  • 1-2 cups crushed potato chips, optional.  (Since we pretty much swore off of potato chips in early 2011, they usually don't make it out of the store with me!)  Today, though, I saw that I still had an unopened bag of Lay's Wavy's left from Christmas Eve, so... I used them on top of this casserole.)
DIRECTIONS:

  • Combine the potatoes, chicken, first 1 and 1/2 cups grated cheese, celery, onion, water chestnuts in a large mixing bowl.  Stir to combine evenly.
  • In a medium mixing bowl, beat together the cream of chicken soup, milk, sour cream, pepper and salt until smooth.
  • Pour the soup mixture over the combination in the large mixing bowl (potatoes, etc.).  Stir to cover all.
  • Add the pre-steamed broccoli florets and stir in gently.
  • Put into a sprayed 10x15-inch baking dish*.
 
  • Cover tightly with foil and bake at 350-degrees for 1 hour**  Then,...
  • Uncover and top with remaining grated cheese and crushed potato chips IF you have some around.
  • Return to oven for 15-20 minutes, or until top is golden brown.

*Rather than use such a large baking dish, you could easily use two 'smallers' and put one in freezer for another time. 

** I needed to put this casserole into the oven this morning and then leave home for a neighbor's funeral held in this very beautiful 'country style' church, about three miles from here...

Before I left home, I put this casserole (tightly covered) into a 295-degree oven and guessed it should be okay like that for the two hours I expected to be gone.  When I got back home, I took it out, uncovered it and put the last grated cheese on the top-- and, the crushed chips on top of that.  Turned the oven up to 375-degrees, put it back into the oven for maybe another 15 minutes, OR until top was showing tinges of being golden brown.  Done!
I am happy to report that my 'official taste tester' (not my hubby) really liked this!

Thursday, January 19, 2012

Brownies, warm, or cooled...........

IF you like 'very chocolatey' (fudgey) chocolate brownies, these are great!

WHOA!!!!--  If you google 'recipe brownie', you will likely come up with  11 MILLION, 3 HUNDRED THOUSAND websites to choose from.  So, take your pick-- or, keep the recipe you already have and like.   I don't claim it to be better than every other brownie in the world, but the recipe I do like is shown  below in this posting...

By lining your baking pan/dish with foil/parchment paper that has 'lift edges' (as pictured below in this post), it is super easy to lift brownies out of the pan while they are still warm.  Almost any frosting put on the top of a 'warm one' will quickly soften and run over the 'cliffs' like this....
OR, as shown at the beginning of this post, let the brownies cool and frost them with the same frosting for this effect...

TIP:  If you don't want your brownies to be cake-like, don't use an electric mixer-- the hand-stirring method makes a more fudge-like brownie.  Just one bowl and a spatula/wooden spoon will do.

8x8 OR 9x9-inch baking pan/dish (I used 9x9-inch)
350° oven

INGREDIENTS: 
  • 4 oz. unsweetened chocolate (I measured out and used 4 oz. of Ghirardelli 60% cacao bittersweet chocolate chips)
  • 1/2 cup melted, or very soft butter
  • 1 cup white sugar
  • 1 teaspoon vanilla extract
  • 2 eggs, slightly beaten
  • 3/4 cup all-purpose flour
  • 1/4 teaspoon baking powder
  • 1/4 teaspoon salt
  • 1/3 cup semi-sweet chocolate chips, as is.
  • 1 cup chopped walnuts (optional) 
DIRECTIONS:
  1. Preheat oven to 350 degrees.
  2. Spray OR grease/flour an 8×8 or 9×9 inch baking pan/dish.  IF it is important to you that you end up with clean/sharply cut edges on the brownies, prepare pan as in the following picture so you can lift them out after baking.   It maybe isn't necessary, but I also lightly spray the parchment paper.
After baking, you can cool them for a while in the dish and then, using the paper edges, lift them out, put 'em on a flat surface  (a cutting board, etc.), frost them and put into the freezer for about two hours (today, I put these on our -9 degree porch for an hour).  Cut with long knife........ and, they'll end up all perfect/pretty!

Back to the main directions...
  • In medium/large microwave-safe bowl, melt unsweetened chocolate (check and stir after each 30-seconds).
  • Add butter and sugar to the melted unsweetened chocolate and stir until well blended.
  • Add slightly beaten eggs and vanilla; stir until evenly blended. 
  • Combine the flour, baking powder and salt; stir this dry combination into the liquid mixture.  Stir gently and only long enough to fully incorporate.
  • Stir in semi-sweet chocolate chips.
  • Stir in chopped walnuts, if desired.
  • Spread evenly into the prepared (sprayed, or greased/floured) pan. 
  • Bake for 25 to 30 minutes in the preheated oven, or until toothpick comes out with just a hint of a 'crumb' sticking to it.  (Toothpick should not be 'covered with brown', and it should not come out totally 'clean'.)  
  • Cool before cutting into squares. (Or, lift out while warm by using 'parchment paper or foil liner with lift tabs' and cut as directed above.)
Frosting (more of a ganache):

Mix together the following...
  • 3 oz. semi-sweet chocolate chips (melted)
  • 1/3 cup heavy cream
  • 1 tablespoon unsalted butter, room temperature 
  • If you want the frosting to be thinner, carefully add milk/cream-- only 1 teaspoon at a time.
Frost brownies while they are still warm IF you want this to run over the top and sides. 
Frost when cool IF you want it to stay on the top, as is usual.  OR,.......... don't frost, at all!

It's -9 degrees here right now, with a windchill of  -20!  Hot chocolate (brown!) and brownies (another brown!) seem so right for today.

Tuesday, January 17, 2012

Popeye Breakfast Cups

I call these a "grab 'n go" kind of breakfast.*
Eat that spinach, "Popeye"!
When anything looks like these look, my husband quite quickly shifts his 'hunger/eating gears' into leary/suspicious mode.  I plated up two for him.  Knowing I was baking some peanut butter oatmeal chocolate chip cookies at the time, he looked at these 'spinach specimens' and asked,  "How about for every one of those I eat, I get two cookies?"  I answered, "Fine. It's a deal!!-- I'll just make sure the four cookies are really small."   LOL!!!   (Fact is,... once he got over the part of seeing so much 'green', these were better than he expected them to be! )


INGREDIENTS:

  • 5 slices lean bacon, fried crisp, blotted dry and crumbled.  Set aside.  (I think these would be so good with browned/drained pork sausage used in place of the bacon!_
  • 1/2 cup chopped onion
  • 2 cloves garlic, minced
  • 10 oz. fresh baby spinach, chopped (since this isn't 'garden season', mine came in a 10 oz. bag).
  • 4 large whole eggs
  • 5 large egg whites
  • 1/3 cup heavy cream
  • 1 teaspoon baking powder (I prefer non-aluminum kind)
  • 1/2 teaspoon ground black pepper
  • 1/4 to 1/2 teaspoon salt
  • 1/2 cup medium cheddar cheese, cut into little cubes.  (Brie cheese can be used instead of cheddar.)

DIRECTIONS:

  • Preheat oven to 375 ° C.
  • Spray a 12-ct. muffin tin with cooking spray.
  • Heat a pan on medium heat.
  • Snip bacon slices into small pieces (1/2 to 3/4").  Fry until golden and crispy.  Blot bacon on paper napkin/paper towel. Set aside.
  • In same or larger fry pan, and using just a little bit of the bacon grease (or olive oil), cook onion until transparent/tender; add garlic and cook for only 1 more minute (garlic burns easily).  
  • Add the fresh baby spinach to the onion/garlic pan (it will look like too much spinach, but it isn't).  Add a little water if the pan is too dry. 
  • Bring to a 'boil' and let spinach boil for about 2 minutes, until wilted down and softened.  You don't want to boil this to the point of it turning 'dark and slimy' (that's a rotten description, but it works!).  If you've added water, thoroughly drain in a colander.
  • Add the crumbled bacon to the spinach/onion/garlic. Set aside.
  • In a medium bowl, beat together the whole eggs and the egg whites, the cream, baking powder, salt and pepper until very well blended.
  • Pour the beaten egg mixture into the spinach.  Add the small cubes of cheese.  Mix gently, but well.
  • Scoop the mixture evenly into the sprayed muffin cups (preferably, leaving 1/4" space).
  • Bake on middle rack for 20-25 minutes (start checking after 15 minutes to see how your oven is doing with these), OR until golden brown and a bit firm to the touch.
  • After cooling for about 15 minutes, I went around edges with a knife and................. they came out!  (Why is this 'removal thing' sometimes a suspenseful moment!?)
Personal opinion:  I took a little taste of one when fresh out of the oven and didn't care for what I thought was a stronger spinach taste.  After 30-minutes, that all changed!  Now, I was better able to taste the other flavors inside. 
 
*The above recipe was adapted (changed) from one on Special Food Recipe's website.  From the descriptions they use, I am guessing that they're English or in another country that uses similar verbage. (?)

Sunday, January 15, 2012

Cheesy Cauliflower Bake

Because this is both vegetable and protein (cheese), some use it as a main dish and build the rest of their meal around this.  (You could easily put bits of ham, or other meat of your choice in this.)
The flavor of this dish reminds me
a lot of Cream of Cauliflower soup--
but,...you won't need a bowl/spoon.

*Blogger Gail from Faithfulness Farm gave a good suggestion on how to make this more of a low-carb recipe.  See note at bottom.

INGREDIENTS:

You will need a 3-quart baking dish.
  • 1 head of cauliflower (about 3 lbs.)
  • 3 tablespoons butter
  • 3 tablespoons flour
  • 1 and 1/2 cup milk (can use low-fat)
  • 1/2 lb. cheddar cheese (2 cups grated).  You'll first use 1 and 1/2 cups of this cheese in the sauce, and the remaining 1/2 cup on top. (I used the white variety of extra sharp cheddar by Cabot and, even without adding other salt, that made this a bit on the 'salty' side.)
  • I suggest you add NO salt, especially IF you use sharp cheddar cheese.

DIRECTIONS:
  • Trim the cauliflower to med. sized florets, and steam (or boil) for no more than 4-5 minutes.  Remove from heat, set aside.
  • In a heavy medium saucepan over medium heat, melt butter, stir in flour and stir together until very smooth. 
  • Add milk and whisk (stir) until smooth.  Stirring constantly while scraping the bottom of the pan with a flat-edged spatula, bring to a rolling boil and continue with that for a minimum of 2 minutes to 'cook the flour'.  Remove from heat.
  • Grate the cheese (doesn't have to be fine).
  • Add 3/4 of the grated cheese to the hot butter/flour/milk mixture and stir until cheese is melted/blended together.
  • Pour a few tablespoons of sauce into bottom of your baking dish and spread it out, layer cauliflower florets on that, and pour the hot cheese mixture over all.
  • Because I used 'white cheddar' in the sauce, I grated just a little bit of yellow cheddar to add color to the set-aside 1/4 portion of the grated white cheese.  Spread the grated cheese over the top.
  • Bake uncovered at 400-degrees for almost 30 minutes, OR until you see the top getting 'browned'.................. like this............... 

* Gail's suggestion:  "I LOVE Cabot cheeses.   I make a very similar dish - only low carb.   I skip the flour, butter and milk and use heavy cream instead (about the same fat as the butter).  The cream will thicken itself as it cooks.  I agree about no added salt required but a little nutmeg is awesome. Oh, so GOOD!!"