Milkmaid's Recipe Box

FOOD, FOOD, FOOD! I'm such a FARMER at heart-- even a CALF knows that so much in life is about the FOOD! (A bit of a "bio" about me can be found way down near the bottom.)

You can find a recipe index entitled "Labels" down along the right side, starting below the picture of the farm. Then, below the "Label" list are pictures of some of my old "standbys"-- click on their picture and it should take you to the recipe.

You will see no advertising on my blog; this means there is no monetary benefit for me having "visitors" or "joiners"-- having said that, if you do wish to JOIN my blog, you can do so by scrolling w-a-y down to near the bottom of the page...

My Visitors

Locations of Site Visitors

Wednesday, October 31, 2012

Pie Crust Cutters

For whenever I want 'openings' in a top pie crust and don't want to make just slits or a strip-lattice top, I can use these which I call my "lazy cutters". With these, I can cut designs on 9" or 10" top crusts.


Below:  I think(?) these first two are made by Norpro and 
they sold for $3.48 each.   They might cost a bit more 
these days. (?)  If you are interested in buying
any of these 'forms', you could check at a kitchen 
supply kind of store, or...just do a google search for
" Lattice & Hearts Pie Top Cutters "
Once you bring up a list of websites, click on "images"
so you can see the various design disks that 
are available and from where.


Below:  I think the next two are from Nordic Ware.  On the left (below), the red pie crust cutter with heart design is REVERSIBLE and can be found at: http://www.everythingkitchens.com/nordic-ware-heart-lattice-pie-cutter-04010.html

On the right, this gold pie crust cutter with the apple design is ALSO reversible and can be found at:  
http://www.everythingkitchens.com/nordic-ware-leaves-apples-pie-cutter-04020.html


 As shown below, this is the pattern on the 
reverse side of the two pictured above...

 The designs are raised and their edges are quite sharp.  

To use them, I first roll the crust to the thickness I want.  Then, I carefully lift it from the table and lay it across the designed disk.  Next, I take the rolling pin and gently press it down as I roll it over the sharp edges of the crust designs.  Just make sure you have the crust rolled down on ALL areas of the raised designs so that when you lift the crust to put it on the pie, you have well-cut openings which make your design.  Some bakers say to lightly dust either the crust or the design disk so that you'll be able to more easily lift the crust off.  

Below:  When I've used the pre-made crusts like what came in this box, I haven't had to flour the crust nor the disk.  But, I suppose if the crust were to get a little too warm, I would HAVE to use a little flour to prevent sticking/tearing. (?)
Wednesday, October 17, 2012

E-Claire (Cream Puff) Dessert

Probably, everybody and his aunt (and uncle)
already have this recipe and have made it many times...
 it's really nothing different than a big ole' 
flattened out cream puff--  well,... sort of!


When I googled 'cream puff dessert', I came 
up with 3,630,000 sites.  That's ALL?!?!?  
I'm posting this because... it's easy, and 
we like it.   It seems that every potluck 
doing I attend has at least one of 
these there and it goes quickly.


Ingredients for the Crust: 
(The same as for cream puffs)

1 cup water
1/2 cup butter
1 cup all-purpose flour
4 whole eggs

Heat the water and butter until boiling.  Take off heat and stir in the flour.  Keep stirring until the dough sort of forms a ball around your spoon (a good wooden spoon works great!).  Let this cool for about 5 minutes.  Then, add the eggs (one at a time), beating after each addition until the dough gets smooth (about twenty strokes?).  The thing to avoid is putting a raw egg into the hot water/butter/flour mixture and having the first raw egg start to 'cook' if you don't stir it in rapidly enough!

Carefully spread that mixture on a sprayed or greased 17" x 12" jelly roll pan-- stay about 1" from the edges because it will spread out as it bakes.

Bake this for about 25 minutes in a 375-degree oven.  Cool for one hour. 

If high bumps develop during baking, just wait until baked crust has cooled and then 'gently' press those humps lower with a spatula.  Sometimes this layer comes out quite evenly for me; other times, like shown below, it isn't so 'pretty' at all.  It really does not matter much as to how this layer looks because, as I said, just flatten it down a bit.  It's going to be totally covered.


FILLING:
8 ounces cream cheese, softened
2 and 1/2  cups cold milk
1 large box (5.5 oz. size) Vanilla instant pudding mix

  • Beat the cream cheese until very smooth-- continue beating while adding milk very slowly.  
  • When that mixture is creamy smooth, add the package of dry pudding mix.  
  • Continue to mix (at a low speed) until this thickens.     
  • Pour this over the baked and cooled crust. (You may prepare this mixture while the crust is baking, but refrigerate it until the crust is baked and cooled.)  


TOPPING:

Cover pudding layer with whipped cream, or other whipped topping.  Like this.


Below:  IF desired, you can drizzle some 
chocolate syrup (or caramel topping?) 
'trails' across the top of the 
creamy layer.  Leave as is, or
swirl the 'trails' around, too, yet.


EXCEPT FOR WHEN SERVING, KEEP 
THIS DESSERT REFRIGERATED

Tuesday, October 16, 2012

Sauerkraut Casserole


The recipe for this casserole is similar to the casserole Janice Schmidt takes to most (if not all) pot luck meals at church.  Janice prepares/bakes hers and then puts it into a crock pot to keep it warm.  It is always a HIT!

You will need to have some cooked rice on hand, or cook it up before you begin the recipe. (I like doubling this recipe because I LIKE sauerkraut and want left-overs.)

Grease/spray a 9x13-inch baking dish.

INGREDIENTS: 

  • 1 cup raw rice (cooked ahead according to directions).
  • 2 lb. lean ground beef, browned and drained.
  • 1 packet dry onion soup.
  • 2  of 10.75 oz. cans  cream of mushroom soup.
  • 1 cup water.
  • 1 large can of sauerkraut (up to 1 quart), drained.  IF you decide to also rinse it, run water over it very briefly/quickly.  If you rinse it for too long, you will eliminate too much of the flavor of the sauerkraut.
  • A sprinkling of French fried onions for the top, just before baking.  (Optional)

DIRECTIONS:

  • Cook the 1 cup of rice and set aside.
  • Brown hamburger and add dry onion soup powder-- mix well and set aside. 
  • Combine cooked rice, cream of mushroom soup, water.  Add this to the meat/onion mixture.   Add the sauerkraut.  Blend well.
  • Spread into greased 9x13 baking dish.  Sprinkle French fried onions on top, optional.
  • Bake in 350-degree oven for about 1 hour.

Saturday, October 13, 2012

Egg Yolk Cookies*

A cookie recipe to use the egg yolks left behind 
after making meringue type recipes...


Because of the dark-colored egg YOLKS, the dough 
for these cookies IS much more yellow than most 
cookie dough, BUT,... the night lighting 
in my room made these baked cookies 
look a 'little' more "yellowish/orangeish" than they really are.

Below:   Yesterday, I was making up a double recipe of egg-white-rich Royal Icing for the assembling of gingerbread houses which will be decorated with 'seasonal candy'.  I wasn't excited about the thought of dumping the yolks.  So,... the recipe below was one option for using the yolks.  

The yolks you see below are SO 'orange-ish' because these eggs came from our free-range chickens-- their diet of grasses, seeds and insects makes for beautiful yolks like these...
  

And,................. cookies like these!


INGREDIENTS: 

   This is a "RICH" kind of cookie!

  • 1 cup butter (OR, use shortening for cookies that won't spread quite as much).
  • 1 and 1/2 cups white granulated sugar.
  • 6-7 egg yolks (or 3 whole large eggs).
  • 1 teaspoon vanilla extract.
  • 1/2 teaspoon lemon extract.
  • 1/2 teaspoon orange extract
  • 2 and 1/2 cups all-purpose flour.
  • 1 teaspoon baking soda.
  • 1 teaspoon cream of tartar.
DIRECTIONS:
  1. Cream butter and sugar until fluffy (I used my Kitchen Aid stand mixer for this  and let it "cream/fluff" for a minimum of 4 minutes).
  2. Separately, beat egg yolks and the three extracts.
  3. Add beaten egg yolk mixture to creamed butter and sugar.  Blend well.
  4. In a separate bowl, whisk together dry ingredients (flour, baking soda and cream of tartar).
  5. Add dry ingredients to creamed butter, sugar and egg mixture.  Mix until well blended.
  6. Form into balls, about the size of a walnut. (Dough is soft/sticky.)
  7. Roll balls in sugar, place on greased cookie sheet OR parchment lined cookie sheet, and slightly flatten.  (I prefer to use parchment paper on cookie sheets.)
  8. I had the best results with baking these at 400-degrees for 8-9 minutes, depending on desired softness/crispness.  (Since ovens can vary quite a bit, check the first sheetful to see how YOUR oven is treating these cookies-- maybe, you'll do better with an oven temperature of just 350-degrees like the original recipe suggested.)


 I like the flavor of the three different 
extracts in these cookies!


*There are quite a few recipes on the Internet for these, or something very similar.   This recipe adapted from Hungry Hintons  at:  http://hungryhintons.blogspot.com/2010/03/egg-yolk-cookies.html  (Thank you, Hintons!)

Monday, October 8, 2012

Fresh Tomato Soup


This soup was so-o-o-o good with crunchy  
golden/grilled (pan fried?) cheese sandwiches!


INGREDIENTS* (About 4 servings)
  • 4 cups chopped/diced fresh tomatoes (or the equivalent in canned tomatoes?)
  • 1 large onion, sliced OR diced
  • 2 cups chicken broth
  • 2 tablespoons butter
  • 2 tablespoons all-purpose flour
  • 1 teaspoon salt
  • 2 teaspoons white sugar, or to taste
* Some cooks like to add a little bit of minced garlic to this soup-- some use the canned minced garlic bought in jars; others saute minced fresh garlic in a dab of olive oil, being careful to not burn it.

DIRECTIONS:
  • In a stockpot, over medium heat, combine the chopped tomatoes, chopped or diced onion and chicken broth.  Bring to a boil and gently boil for at least 20 minutes to blend all of the flavors.
  • Remove from heat and run the the boiled mixture through a food mill into a large bowl, or pan.  Discard any solids that are left over in the food mill.  (If you do not have a food mill, you could use a stick blender OR regular blender and then strain the mixture afterwards.)
  • In an empty kettle, melt the butter over medium heat.  Stir in the flour to make a roux, constantly stirring and cooking until the roux is a very light brown.
  • Gradually whisk about a cupful of the hot tomato mixture into the hot and thickened butter/flour roux-- whisk so that no lumps form.
  • Add this blended roux into the rest of the hot tomato/onion mixture.  Whisk quickly and thoroughly.
  • Season with sugar and salt according to taste.  Serve.


Friday, October 5, 2012

Rocky Road Fudge (Makes almost 5 lbs.!)

Above:  I love 'loaded' fudge-- if you don't, 
you can control that by altering the recipe.

This great (and easy) fudge recipe came our 
way from Paula-- thank you, Paula!


IF you just so happen to know anyone who likes 
fudge,... this is an easy 'GIFT-y" item.

Above: For those who do not like (or cannot eat) nuts, 
add only the mini marshmallows.
I sometimes put the above variation of fudge mixture in 
the 8x8-inch dish; then I quickly add the walnuts 
and fill the 9x13-inch dish, as shown below.

Above: Fudge with a lot of walnut pieces, 
plus the mini marshmallows.

```````````````````````````````````````

Before you begin this recipe, generously butter a 9x13-inch AND an 8x8-inch baking dish for when the fudge is done.

1.  Put 3 cups miniature marshmallows in a shallow container and put into freezer--- freeze until "FROZEN".  You'll add these at the end.  (You can put these in the freezer way ahead of time, if you wish.)  These are frozen ahead of time so that they won't quickly melt INTO the fudge when they're added at the end.

```````````````````````````````````````````

2. In a large heavy saucepan, combine the following three ingredients, heat just until melted and blended together and set aside (you could microwave these in a microwave safe bowl for one-minute increments until it's all melted and blendable):
  • 20 oz. total (three of the giant-sized?) Hershey OR Symphony OR Dove milk chocolate candy bars (broken into pieces)

  • 12 oz. bag of semi-sweet chocolate chips (I prefer the Ghirardelli brand)

  • 1 cup butter (cut into pieces)


``````````````````````````````````````````

3.  Combine the following three ingredients:

  • 4 cups white granulated sugar
  • 1 can (or 1 and 2/3 cups) evaporated milk
  • 2 and 1/2 cups miniature marshmallows (not the ones you have frozen) and bring to boil over medium heat. 


Stir constantly to prevent scorching on the bottom.  Continue to cook and stir at a light but steady boil for 7 minutes.  

Remove from heat immediately after 7 minutesPour this very hot mixture over the "set aside" chocolate/butter mixture in the heavy saucepan or bowl.

With a wooden spoon (preferably), stir until chocolate/butter is melted and the mixture is well blended.  Continue to stir* until candy loses 'SOME' of its shine. 

After  few minutes(?), when it has lost 'some' of its shine, stir in the still-frozen 3 cups of miniature marshmallows2 teaspoons vanilla, and 1 pound (or less, or none?) walnut halves (once the frozen marshmallows have been added, you don't want to stir long enough to make them soften/melt-- but, to keep their shape).

* If you stir for too long after it loses some of its shine, the fudge will, almost in an instant, start to firm up too quickly and you won't be able to incorporate the frozen marshmallows, vanilla and walnuts.

Immediately pour into the two buttered pans-- one a 9x13", and the other an 8x8".  Cover with Saran wrap, and refrigerate for at least 2 hours before cutting.  Keep refrigerated until ready to serve.  (Better yet, double-wrap unused portions first in Saran wrap and then aluminum foil.  Freeze in an air-tight container.  It will stay 'good' for a long time-- IF it survives! ) 
Ah-h-h-h-h-h-h-h-h-h................
 

Thursday, October 4, 2012

Phil's "Skinny" Chili


"Over the years, the cooks (from our most local medical center) have tried recipes submitted from other employees.  This one proved to be a favorite."


When I saw this recipe in the recipe book, 

Recipes & Remembrances, 


put together and sold to celebrate the medical center's 75th Anniversary (1931-2006), I was reminded of a very similar chili recipe I often made in the early 1970's.  This particular recipe was submitted by Phillip T. who had been the Radiology Manager at the hospital for a lot of years.  I remember Phillip from when he attended the same grade school and high school that I did.

*My very first real employer (for $$) was for a "hospital building fund".  I worked at that job from June of 1962 until the Spring of 1963 as their one/only secretary-- this was based out of a basement room of the local county courthouse.  When the 'mission' for that was completed, I was 'moved' to work in the main office of the hospital at its present location.... having gotten married in 1963, I continued working there until the Fall of 1963, when I quit to stay home and help with farm chores while awaiting the birth of my (our) first child in 1964.


INGREDIENTS*:
  • 2 lbs. lean ground beef
  • 2 medium onions, chopped
  • 1 green pepper, chopped
  • 1 bunch celery, chopped
  • 1 of 15 oz. can chili beans, undrained
  • 2 of 15 oz. bean sprouts, drained and rinsed
  • 2 of 15 oz. diced tomatoes
  • 1 of 46-ounce tall can tomato juice OR V-8 juice
  • 1 cup ketchup
  • 1 tablespoon Lawry's seasoned salt
  • Ground black pepper, to taste
  • 1 tablespoon dried oregano, rubbed between fingers to release flavor
  • 1 tablespoon dried sweet basil leaves, also rubbed between fingers
  • 1 tablespoon garlic powder
  • 1/4 OR 1/3 cup chili powder, OR 1 packet of chili seasoning mix
DIRECTIONS:

Combine beef, onion, green pepper and celery and fry until beef browns.  Drain excess fat and return mixture to 6-quart kettle.  (After I drain excess fat off, I sometimes take a cup of very hot water and pour that over the drained meat, also.)

Add chili beans, bean sprouts, diced tomatoes, tomato juice and ketchup.  Mix well.  Add the salt/pepper, oregano, sweet basil, garlic powder and chili powder.  Mix very well! Cook over low heat for 1 hour.  (Rather than cook it on top the stove and risk scorching what's in the bottom, I prefer to cover and set it in the oven for an hour at 350-degrees.  


I liked this chili recipe in the 1970's, and liked it just as much tonight.  Our little "borrowed' 7-year-old girl asked for seconds because she liked it so much, also.

* The variations I made with this recipe today 
weren't enough to change the end result.   
Enjoy!!!

Tuesday, October 2, 2012

Apple-Pecan Cheesecake

Above:  No, I did NOT use apples made of wood!

Apples!-- besides enjoying apple-laden goodies, 
 when I see ripe apples, I think of:
  • The Shawano County Fair, because that's when the early apples in our orchard were ready for picking.   
  • My mother cooking large kettles of applesauce and apple butter on the wood stove (later, on her modern and very welcomed electric range).  I still remember (and can smell?) how s-w-e-e-t the house smelled at times like that.   Today, it is EXACTLY 105 years since my mother was born in Montague County, TX-- she  left us with great memories on March 13th of 1982.
  • The 'too many' wasps/hornets sitting on windfall apples, especially on the apples  with soft or rotten spots-- they were either trying to zap some sweetness from them, or get DRUNK!?  (SMART hornets/wasps don't fly drunk!--but, I don't suppose it's possible to have a 'designated flyer'!)  As a child, I was SO afraid of those yellow/black winged things! 

Above:  These are named Snow Apples and are at their best AFTER a few frosts.  The tree, itself, is older than I am-- and, I'm 68!  Its trunk is almost totally hollow by now.  A few years ago, already, the opening at the base of the trunk was large enough for THREE young raccoons to hide in.  


Because it's 'apple season', I wanted to make an apple-pecan cheesecake-- I chose this particular recipe from the Kraft Foods website.  (I LIKE it because it's very apple'y' and, yes, cheesecake'y', too!)

INGREDIENTS:
  • 1 and 1/2 cups graham cracker crumbs (for me, this was one full sleeve).
  • 1/4 cup butter, melted.
  • 2 tablespoons brown sugar, packed.
  • 4 packages (8 oz. each) cream cheese, softened.
  • 1 and 1/2 cup packed brown sugar, divided into 1 cup and then 1/2 cup usages.
  • 1 teaspoon vanilla.
  • 1 cup sour cream.
  • 4 eggs.
  • 3 Granny Smith apples (or another firm type of apple), peeled, chopped.
  • 3/4 cup pecans, chopped.
  • 1 teaspoon ground cinnamon.
DIRECTIONS:
  • Heat oven to 325° F.
  • Line 9x13-inch pan with foil, with ends of foil extending over each of the sides.  
  • Mix together graham cracker crumbs, melted butter and 2 tablespoons brown sugar; press onto bottom of prepared pan.
  • Beat cream cheese, only 1 cup brown sugar and the vanilla in large bowl with mixer until blended.  (I did all of this with my food processor.)
  • Add sour cream; mix well.
  • Add eggs, 1 at a time, mixing on low speed after each just until blended.
  • Pour beat/blended cream cheese mixture over crust.
  • Combine remaining 1/2 cup brown sugar, chopped apples, nuts and cinnamon-- mix well.
  • Sprinkle this apple/nuts mixture evenly over the cream cheese batter.
  • Bake for 60 minutes or until center is 'almost' set.  (Some who've tried this recipe said they needed to add up to 10 minutes of baking time, or so.  Watch for how yours is baking, and decide accordingly.)  When I took mine from the oven today, it looked like this:

  • Refrigerate for at least 4 hours.
  • Use foil handles (tabs) to lift cheesecake from pan and move to cutting board before cutting to serve.  
  •  For future servings, this dessert freezes well in airtight containers. 

ENJOY!

Monday, October 1, 2012

Beef Roast w/Vegetables

We are nine days into Autumn!  
I knew I wanted to go walking in our beautiful 
woods today, hoping I would NOT 
see any wolves or bears!   Anyhow, ...
before leaving the house, I 
combined some goodies for our 
supper ("dinner" to city folks!) and 
let the oven do the rest.  The meal I 
put together happened to be color coordinated 
with the beauty I saw on my walk (see below).

My Lazy Easy Day Meal!

INGREDIENTS:


  • 1 (3-5 lb.) beef roast-- you can use a pork roast if you prefer.  If you can't afford a 'large' roast, use a little one-- that will work, too.
  • 1 tablespoon olive oil.
  • 2 teaspoons garlic salt.
  • Freshly cracked black pepper, to taste.
  • 1 can (15 oz.?) vegetable OR beef stock.
  • 6 large carrots, cut into chunks (3 carrots, if making smaller quantity in slow cooker).
  • 1 large onion, cut into whatever size pieces you like.
  • 6 large stalks of celery, cut into 1" pieces (3 stalks, if making smaller quantity in slow cooker).
  • 3 lb. bag of small red potatoes, scrubbed and cut into halves (OR as few as 8  potatoes if using a slow cooker for smaller quantity.)
  • 2 cans of 10.75 oz. cream of mushroom soup (I like the 99% fat free variety).
  • 1/2 teaspoon dried thyme.
  • 1/2 teaspoon dried sage.
DIRECTIONS:
  • Spray 6 quart enameled cast iron dutch oven OR slow cooker container with non-stick spray.
  • Prepare carrots, onion, celery, potatoes and put them in the bottom.
  • Pour the vegetable OR beef stock over the layer of vegetables.

  • Drizzle olive oil on both sides of the roast and season it well with the garlic salt and ground pepper (rub it in). 
  • Lay the roast on top of the mixed vegetable layer.  (The side of the roast with the most fat on it should be on top-- upwards. I  k-n-o-w,... it's said that FAT gives flavor, but I just cannot resist trimming excess fat off-- now, I didn't say "ALL", I only said "...excess"!) 


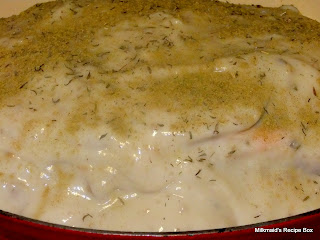
  • Smear the cream of mushroom on top of the roast and then sprinkle that with the thyme and sage. 

  • Cover and cook for about 5-6 hours in oven at 295-degrees, OR for about 8 - 10 hours in slow cooker on LOW.  (As I checked on its 'progress' after a few hours, I ladled some of the sauce over the top of the roast.)


I think you will like how this makes your home smell.

I think you will like how easy it was to make.

I think you will like how moist the meat is.

I think you will like it, period!

Here,... try it!

Below:  A week or so ago, Bruce came over 
with AMBITION, lawn equipment and more!  
Before long, the yard around the cabin 
was freed of brush, and the VERY overgrown 
grass was cut (for the first time in a 
couple of years, I might add!).   Today, when I went 
'back there', ...everything looked 
SO-O-O-O pretty!

Nadine's MONSTER Cookies


This is already an 'out there' recipe, but my first experience with it came in 1985 when my sister Nadine made these and shared them with our family.  There's good stuff in these cookies and they are more 'filling and satisfying' than a cookie usually is.  This particular recipe makes a LOT of cookies-- sometimes, I bake them all up on the same day and freeze a lot of them; other times, I'll bake some and freeze the rest of the dough for another time.

It is not a mistake-- there is no flour nor salt used in this recipe

You will need a HUGE mixing bowl, and plenty of muscle to mix these up.

Start at the top of the following ingredient list and mix together, stopping to mix after each addition.  (Because I have a large-bowled and more powerful model of Kitchen Aid stand mixer, I can get away with dumping in everything from this first list and mix it together with that.  Then, I dump all of the mixed dough into a really large mixing bowl, add the final three ingredients and mix by hand.)

1 pound butter, room temperature
3 lbs. natural peanut butter (crunchy or creamy)
4 cups white granulated sugar
2 lb. bag of brown sugar
12 eggs, slightly beaten ahead of time
1/4 cup vanilla
2 tablespoons light corn syrup (I like Karo)
8 teaspoons baking soda

Now, add:
18 cups ROLLED OATS (quick-cooking, or old fashioned)
1 of 12 oz. package semi-sweet chocolate chips
1 lb. bag of plain M&M's (optional)

Pre-heat oven to 350-degrees

Take scoops of dough and form into 2" balls, place on cookie sheet that's been lined with parchment paper or aluminum foil.  Air-bake pans work well because these cookies like  to darken on the bottom before their tops and centers are done.  Since oven temperatures vary, baking time could be between 12 and 14 minutes (or ??).   Let cookies cool on pans for a while.

Here!, sit a while and have a cookie.........................