Milkmaid's Recipe Box

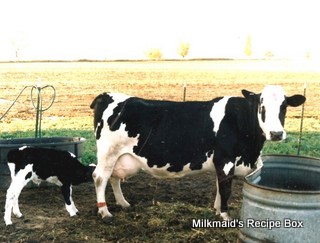
FOOD, FOOD, FOOD! I'm such a FARMER at heart-- even a CALF knows that so much in life is about the FOOD! (A bit of a "bio" about me can be found way down near the bottom.)

You can find a recipe index entitled "Labels" down along the right side, starting below the picture of the farm. Then, below the "Label" list are pictures of some of my old "standbys"-- click on their picture and it should take you to the recipe.

You will see no advertising on my blog; this means there is no monetary benefit for me having "visitors" or "joiners"-- having said that, if you do wish to JOIN my blog, you can do so by scrolling w-a-y down to near the bottom of the page...

My Visitors

Locations of Site Visitors

Tuesday, July 15, 2014

Dutch Blueberry Cake*

To pacify my craving for a blueberry SOMEthing,
I made this snack cake!

Blueberry season is almost here... BUT!!!, I was
disappointed to find out the"closest to here" U-Pick 
blueberry farm will NOT be having any U-Pick
blueberries this year!  You can read why at:
As stated, ONLY "already picked" blueberries can be 
ordered ahead of time and will cost $20 per 5-qt.  pail.

INGREDIENTS:

For The Cake...
  • 3/4 cup sugar
  • 1/4 cup vegetable oil
  • 1 large egg
  • .......
  • 1/2 cup milk
  • .......
  • 2 cups flour
  • 1/2 teaspoon salt
  • 2 teaspoons baking powder
  • .......
  • 2 cups fresh blueberries, or well-drained frozen/thawed.
For The Topping...
  • 1/4 cup butter, slightly softened
  • 1/3 cup flour
  • 1/2 cup granulated sugar
  • 1/2 tsp. cinnamon
DIRECTIONS:
  • Grease and flour (or spray) a 9x9-inch baking dish.
  • Cream together the sugar, oil and egg until lemon-colored.
  • Stir in milk.
  • Sift together flour, salt, baking powder and very gently stir into the creamed mixture, just until incorporated.
  • Gently fold in the blueberries.
  • Spread batter into a greased and floured 9"x9" square baking dish.
  • For the topping:  Cut the butter into the flour/sugar/cinnamon mixture.  Mix well and sprinkle over the top.  (I did this in my food processor.)
Below:  This is how it looked before baking...

In pre-heated 375-degree oven, bake for about 45 
minutes, or until inserted toothpick comes out clean.

Below:  This is how it looked when done...

And, later,....it looked like this!
YUMM-O!  (We added a ball of ice cream to this!)

without a picture, I was pleasantly surprised to see how the 
finished product turned out!
Monday, July 14, 2014

Farmers' Pizza Casserole


This seems like a kind of comfort food-- it could 
be because I'm recalling how often we relied 
on casseroles during our busy 
(and often unpredictable) dairy farming days.


Servings 10-12

INGREDIENTS:
  • 8-12 oz. egg noodles, cooked just until tender
  • 1 lb. ground beef, browned and drained
  • Salt according to preference
  • 1 tablespoon green pepper, chopped
  • 1 medium onion, chopped
  • 14 oz. jar or can of pizza sauce (You could make your own with the same amount of tomato sauce and oregano or Italian seasoning.)
  • 1/3 cup sour cream
  • 1 cup cottage cheese
  • 8 oz. cream cheese, softened
  • 2 cups shredded Mozzarella cheese
DIRECTIONS:
  • Brown beef with chopped onion and chopped pepper. 
  • Add pizza sauce.  Set aside.
  • While the meat is browning, cook the noodles just until tender.  Set aside.
  • In med. sized bowl, combine sour cream, cottage cheese and softened cream cheese. Set aside.
  • Place just one-half the cooked noodles in a buttered or sprayed  9x13" baking dish. 
  • Cover with the cheese mixture.  As shown below, I first dropped dollops of the cheesy mixture on the noodles and, after the heat of the noodles warmed up the dollops, they were easy to spread out... 
  • Next, add the remaining cooked noodles...
  • Top with beef mixture.
  • Cover top tightly with foil, and bake at 350-degrees for 40 minutes.
  • Sprinkle the Mozzarella cheese on top and return to oven, uncovered, for 5-10 minutes, or until cheese is evenly melted.  Like this...

Enjoy!

Sunday, July 13, 2014

Salmon Patties*

Gluten Free Paleo Salmon Cakes

Above:  Most people probably take the stem 
part off the peas before cooking-- I don't because 
that part  is my "handle" when eating 
both the pods 'n peas.

IF you can get past seeing the contents of a newly 
opened can of Fresh Caught Wild Alaskan Pink 
Salmon with its bones and dark skin included, and 
IF you actually LIKE Salmon, you might like these.
(If you don't want to deal with the skin/bones 
scene, buy boneless and skinless Salmon.)

First time around, these patties were 
eaten as shown above.  
We used the left-over patties in sandwiches 
the next day and everyone here liked them that way, too, 
along with leaf lettuce and whatever sandwich sauces 
each of us preferred.  (I chose Thousand Island salad 
dressing; others chose Miracle Whip, etc.)


Recipe makes about 10-11 patties...

INGREDIENTS:
  • 1 of 14.75 can Pink Salmon (Fresh Caught Wild Alaskan Pink Salmon)
  • 1 medium onion, diced
  • 2 ribs of celery, finely diced
  • 1 and 1/2 tablespoons dried dill
  • 1 and 1/2 teaspoons lemon pepper
  • 1/2 teaspoon sea salt (I used pink Himalayan salt)
............
  • 3 tablespoons coconut flour
............
  • 4 large eggs, slightly beaten
............
  • 1/3 cup coconut oil
DIRECTIONS:
  1. In a bowl, break the Salmon up with a fork (I first removed the skin and most of the larger bones). 
  2. Add the diced onion, celery and spices.
  3. Min in the coconut flour and stir it in for about a full minute.
  4. Add the slightly beaten eggs and mix for about one more minute.
  5. Shape the mixture into about 10 patties, roughly 1/2" thick and 2" wide.
  6. Put coconut oil into a skillet and heat to medium high.  Add the patties to your pan and cook until each side is golden brown, maybe 3-4 minutes on each side.  
Below:  Our sunset scene at 8:35 PM tonight...

* Recipe adapted from  http://www.agirlworthsaving.net/2012/04/gf-paleo-salmon-cakes-recipe.html

Monday, July 7, 2014

Meat Loaf (I made these "individual-sized")

YESTERDAY:  Part of our two-day-early birthday 
dinner (our noon meal) for my husband...
 his birthday photo is at the bottom of this posting.

I baked these in two larger kinds of 
6-"well" muffin tins with each 
opening having a 1-cup capacity.

Ingredients** for about 4-5 servings:

1 pound ground beef
1 and 1/4 teaspoons salt (I used Kosher salt, while waiting for my pinkish Himalayan salt* to arrive sometime today.)
1/4 teaspoon pepper (I used coarse ground)
1 cup chopped onion
2 eggs, slightly beaten
8 ounces of canned diced tomatoes, drained
1/2 cup dried bread crumbs, soaked in 3 tablespoons milk
................
Topping:  1/3 cup ketchup, 2 tablespoons light brown sugar, 2 teaspoons prepared mustard.
...............
* Himalayan salt information: https://www.google.com/search?q=himalayan+salt+benefits&oq=himalayan+salt+ben&aqs=chrome.1.69i57j0j5j0j69i60.7568j0j1&sourceid=chrome&ie=UTF-8

** I doubled all of the above meat loaf and topping ingredients just so I could use ALL of a 15-16 oz. can of diced tomatoes, and I ended up with about 11 generous 2/3-cup servings.

Directions:

Mix all meat loaf ingredients well.  Lightly, but thoroughly.

Baking Choices:  
  • Shape mixture in a greased/sprayed baking dish or loaf pan. 
  • Take 1/2-cup amounts and place into a greased/sprayed regular-size muffin tin.  OR...
  • Take 2/3-cup amounts and place into the larger kind of greased/sprayed muffin tin as shown in my photos to end up with 11 servings (if doubling the above recipe).
Bake in preheated 375-degree oven for about 1 hour if you bake the "original size recipe" in a loaf pan, or baking dish.     Bake for about 30 minutes if using the standard size muffin tin with 1/2-cup portions.  Bake for about 44 minutes if using the larger sized muffin tin holding 2/3-cup portions.  BUT!!!!, as always, since ovens vary, please bake according to how YOUR oven bakes, and according to how YOU like YOUR meatloaf to be!

Below:  This is how mine looked just before going into the oven.   I did not pack the mixture in!  Instead, I made a gently-handled 2/3 cup "ball", put that in, and then very slightly/lightly flattened the top of each so the topping would stay on them without running off into the muffin cups.


Below:  Here, they've just come from the 
oven...  to remove from the tins, I first went 
around edges with a small silicone spatula, 
then lifted each out with a large 
serving spoon.   DONE!!!!!


Below:  Moved to a serving plate and ready to go...

Above: These were a hit!
.............................................

This IS his cake/number, but 
he hardly looks like 74!

Above:  He LIKES fruit-- so, his "order" was for a strawberry poke cake with real whipped cream topping.  It was only fitting that the finishing decorations on top were of MORE fruit-- blueberries and six HUGE blackberries.  (Thank you, daughter P.-- ♥!)  

On the front of daughter P's birthday card to him, there are four old hens sitting on their nest, saying "HEY!  IT'S YOUR BIRTHDAY! ...DON'T JUST SIT THERE... (and, on the inside):  "AGE!"  

I know,...  I said, too, it seems harder to believe he is turning 74 because his hair isn't falling out, and his always NATURALLY brown hair is NOT turning gray (not very much, anyhow!).  Happy Birthday, husband,... on Tuesday! 
♥ ♥ ♥ ♥ ♥ ♥

 I ♥m so th♥nkful for our 51 ye♥rs of m♥rri♥ge, ♥nd our gre♥t blessings of h♥ving five children, 17 gr♥ndchildren, ♥nd 10 gre♥t-gr♥ndchildren!