

All photos in this posting by me, Doris


This is said to be a French upside down apple tart.
I hope it's okay that the German and Irish in me
thinks it's... great! And,......
It is easy to make, too!

More photos shown in the posting below.
You will need:
- A 10-inch cast iron skillet, or other heavy round pan.
- 1 recipe for a single 10-inch pie crust, rolled out to 1/8-inch thick.
- 1/2 cup (1 stick) salted butter, room temperature
- 1/2 cup white sugar
- 1 teaspoon vanilla
- 9-10 firm-type apples, any high acid firm apple with a hint of sweetness, peeled, cored, and halved.
Directions:
- Make your favorite recipe of a single 10-inch pie crust, wrap tightly and refrigerate until needed. (Or, you can use one store bought refrigerated 9" pie crust dough and it will cover this 10" skillet.)
- Stir together the sugar and vanilla until evenly mixed. Set aside.
- Pat the soft butter down evenly onto the bottom of a skillet.
- Sprinkle the vanilla sugar evenly on top of butter layer. Set aside.

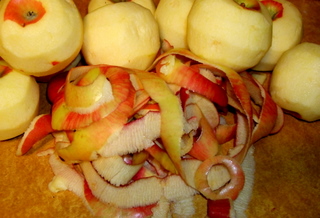
- Peel, halve, and core the apples.
- Place the prepared apple halves vertically (standing up) in the pan, in a circle around the outside edge. Keep repeating until the whole pan (even the center) is filled with apple halves.

- Place the pan of apples over medium heat (I had these going at just a bit lower than medium on my stove). Let this heat/cook/bubble for 20-25-30(?) minutes, or until the butter, sugar, and apples have created a medium golden brown caramel sauce bubbling in the pan. (I did a little taste test of the 'hot stuff'.) To avoid burning the caramel'y mixture underneath the apples, do NOT have the heat too high.
Below: See the 'bubble-bubble-bubble'-- it's almost ready to have the crust put on!

- When the caramel sauce seems just right, let this cool for a few minutes while you roll your pie crust dough out to 10-inches (or, if you prefer, use a refrigerated ready-made store bought crust-- a 9" of that will fit on a 10" cast iron skillet).
- Lay the rolled-out crust on top of the apple layer and tuck the outside edges of the crust inward/downward all around the edge of the pan. Like this.....

- Preheat oven to 400-degrees. Put into the oven and bake for about 20-25 minutes, OR until the apples are bubbling and the crust is golden brown. (Check after 15 minutes to see how yours is looking.) By making a little larger ♥ hole in the center of the crust, I could better watch what was happening inside the tarte.

- Bring to room temperature and flip upside down onto a serving plate.
- Done!
P.S. The 'impatient' in me was eager to see how it turned out for this first time, so, ...I did not wait until it cooled to room temperature before giving it a flip-- but!, I did manage to wait for about 30 minutes. With as pretty as this was looking, and with how g-o-o-o-o-d my kitchen was smelling, I needed a medal for waiting THAT long! While the juices might have still been a bit thinner when it was warm like this, it did not matter! This is a dessert that really TASTES like apple-- a lot of apple. I will be making this...............AGAIN!

(Thank you, Claire Thomas, for making this recipe
and showing ME how it's done-- and, you were
so right when you said this was a good one!)
P.P.S. Since the crust on top is tucked inward/downward just before baking, it helps to use a large serving plate that has a bit of a raised edge so that the crust has 'somewhere to go' when flipped over-- but, again, it does not really matter if the crust has a bit of a 'wreck' when it 'meets' the serving plate because it stays good tasting, anyhow! No part of the taste is affected by any of that piddly stuff.
Here! Yes,... it's still warm, but,... let's give it a try... we just gotta do this!


Try it with some whipped cream, too....

- I saw Claire Thomas of the kitchykitchen blog site make this on our local ABC-TV station this morning. Since I've been wanting to use some apples for 'something', this was a good choice! (I changed the original recipe very little and, in my opinion, only in insignificant ways-- mostly with wording, etc.)
To Jennifer of D.N.-- overnight, a picture or two on this posting went bonkers and I had to re-post them. In doing so, your sweet comment disappeared (the one on my original posting of this recipe). :(
ReplyDelete