

Angel food cake, fruit and whipped cream!


Fruity desserts like this seem to be extra
light and refreshing even in the dead of Winter!
light and refreshing even in the dead of Winter!


1 of 10-inch angel food cake (I made mine from a box mix).
1 pint fresh fruit (raspberries, blackberries, strawberries, blueberries, etc.). You could use a 10-12 oz. container of frozen berries, like I did, and set a few aside (blot them dry to use for garnishment).
1/2 cup sugar
2 cups heavy whipping cream (OR whipped topping?)
1/4 cup sugar
1 teaspoon vanilla
4-6 drops of red food coloring, optional (I also used just 3 drops, plus a very small amount of the raspberry juice left in the bowl).
DIRECTIONS:
- Bake angel food cake according to directions, and completely cool.
- While the cake is cooling, add the 1/2 cup sugar to the berries and crush them a bit (saving some berries back for top garnishment). Set aside.

- When cake is fully cooled, remove from pan and gently de-crumb its surface with the edge of a knife or whatever else would work for this. If you don't want a darker crumb to be underneath the finished dessert, you can gently/carefully slice that off, too, at this point-- it's the part that is 'on the bottom' in this next picture.

- Working at the top of the cake (which was the bottom when it was baking!) and with a very sharp knife, cut (saw?) two vertical slits at 1-inch intervals around the top of cake, between the center and rim, cutting through cake from top to 'almost the bottom'.

- Carefully, hold slits apart and insert berries into them. You could use a table knife to help get the berries lower into the openings, but that may not be necessary. Then, spoon any left-over juice evenly over berries in the openings.

- Whip cream with sugar, vanilla and food coloring (I opted to use some of the berry juice to color the cream).
- Cover entire cake with cream, using spatula or piping bag.
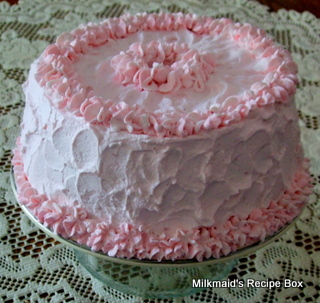
Garnish with some 'saved' fruit...

- Refrigerate 2 to 3 hours. Slice and .........enjoy!


So delicious looking!! I am hungry just reading your post...and not for anything but this heavenly cake!
ReplyDeleteJennifer
Thanks, Jennifer! I think it's the combination of fresh (almost!) fruit and the COLDNESS that makes this such a refreshing kind of dessert. We made some other 'filled cakes' back in the days of Home Economic class, too. As IF a cake needs extra filling, huh! LOL. Thanks for stopping by.
ReplyDelete